
Easy Painted Holiday Gourds
I inherited a batch of dried gourds from a lovely woman who was a fantastic gourd artist, crafting her gourds into beautiful works of art and whimsical characters. She inspired me to host a painted gourd workshop at our church for crafting some to sell at our Christmas bazaar. Some ladies in our group were a little leery about painting the gourds by hand, so I came up with this easy version to make beautiful works of art.
Supplies:
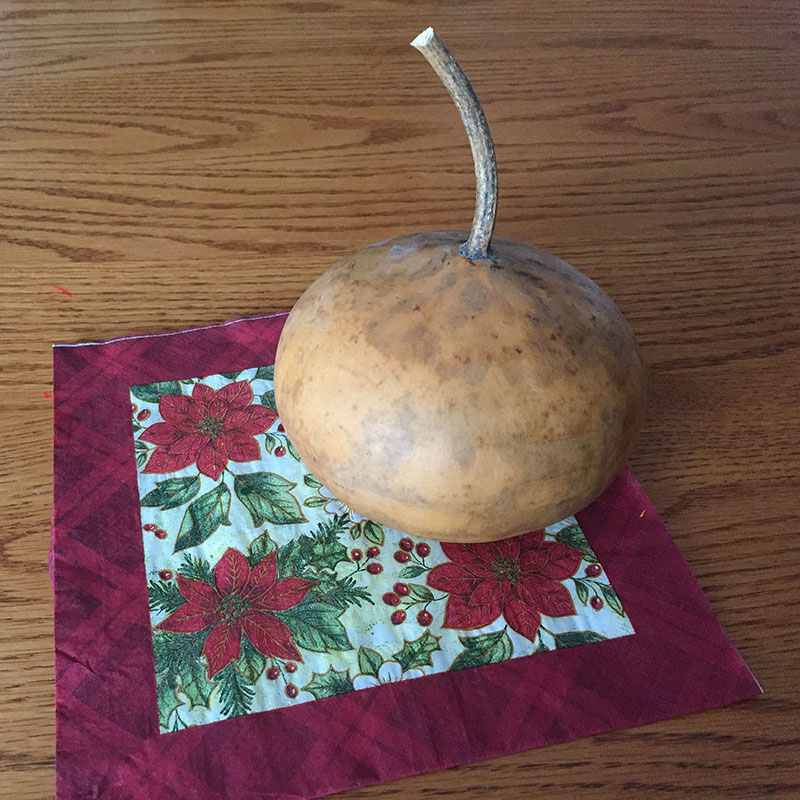
Dried gourd (Can be purchased online, at farmer’s markets or craft fairs.)
Acrylic paint in white, khaki and Inca gold
Sponge craft brush
Modge Podge or other decoupage medium
Decorative napkin or tissue paper
Glitter
Paper plate
Ribbon or other embellishment (optional)

Step 1: Paint the background
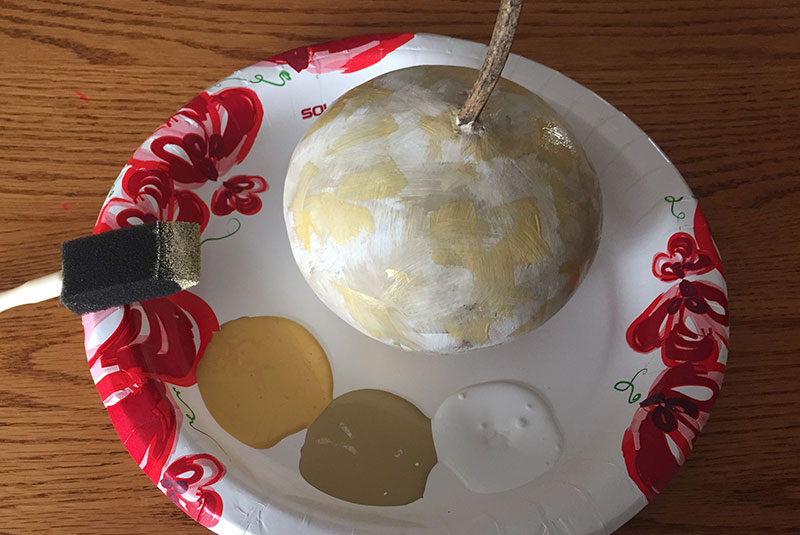
An easy trick to adding dimension to painting is to use three similar colors as one. For this example, I use white and khaki paint, then add the gold after a little drying time. (This helps to keep the gold metallic from getting dulled by the other paint.)
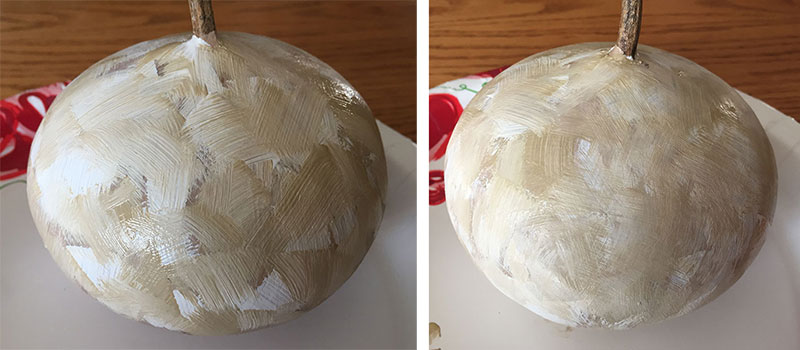
Use the paper plate to protect your painting surface and squeeze a little blob of white and khaki paint at one side.
Start with white paint and lightly dab in different places and at different angles, leaving spaces in between the paint. This works best with a tiny bit of paint at a time, keeping the brush mostly dry.
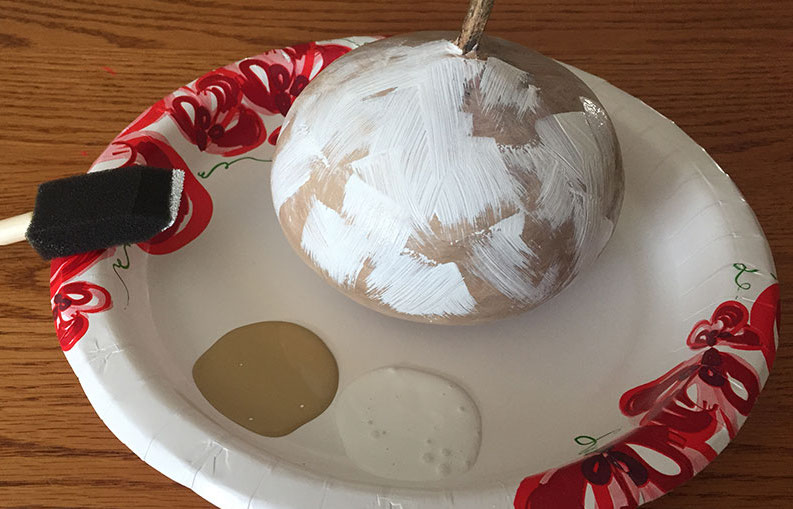
Add khaki with the same technique.
Then, using the brush with no additional paint, brush through the two colors to lightly blend. Brush at different angles and you can leave unpainted spaces if desired.
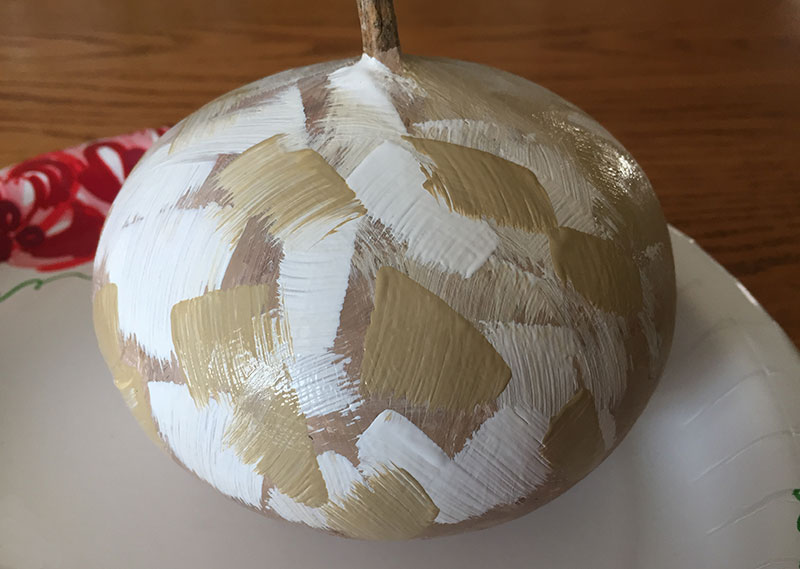
Step 2: Add the gold paint
After waiting a few minutes for the white and khaki to mostly dry, add the gold paint and lightly blend using the same technique as above.

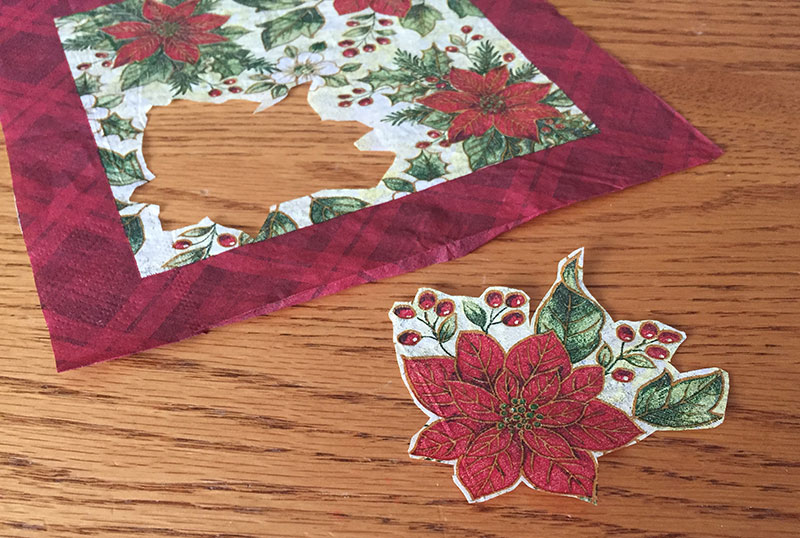
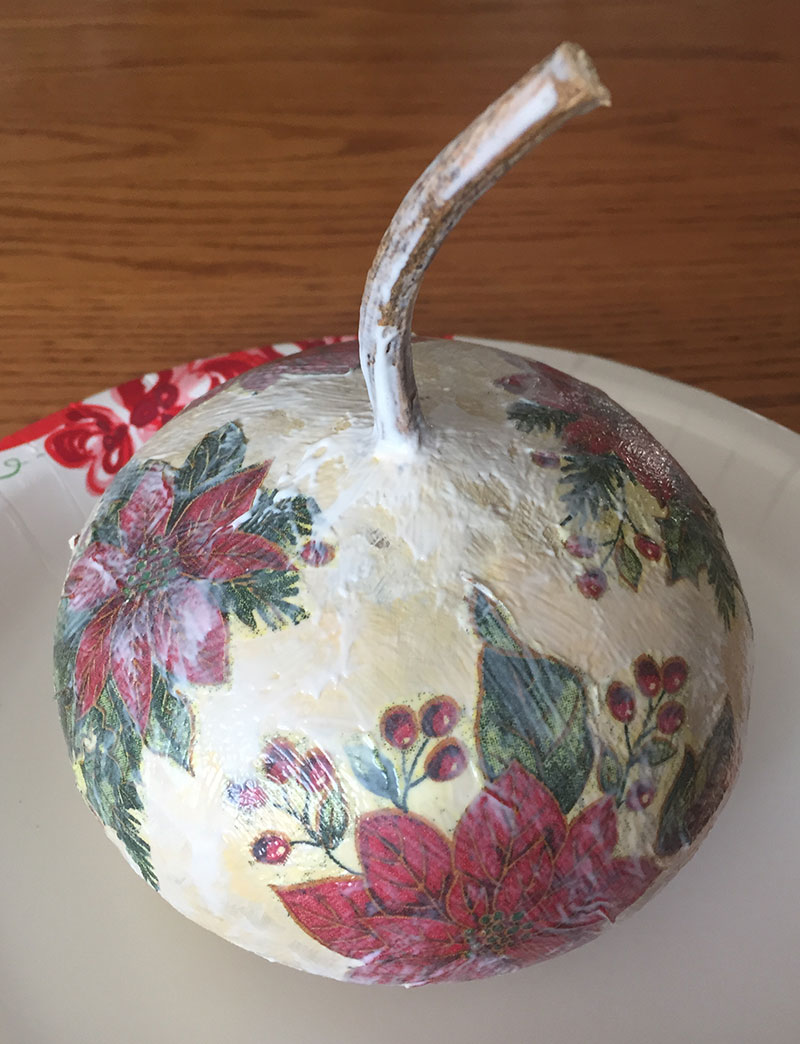
Step 3: Prepare the decorative paper
If needed, peel the backing paper off the napkin. Cut out decorative shapes. (I kind of cheated a bit with these poinsettias. They have a similar background color to the gourd background, so I didn’t have to cut exactly at the edges. Tricky!)
Step 4: Decoupage the paper onto the gourd
Plan out how the shapes will work on the gourd before starting.

Paint a layer of Modge Podge on the space where you are placing the first shape, then press the shape onto the glue at the center. Carefully smooth the shape onto the gourd, starting in the center and moving toward the edges. It’s okay if you get a couple creases (it’s crafty that way!) but the paper should form smoothly around the gourd.
Continue adding the glue and shapes until they are all placed.

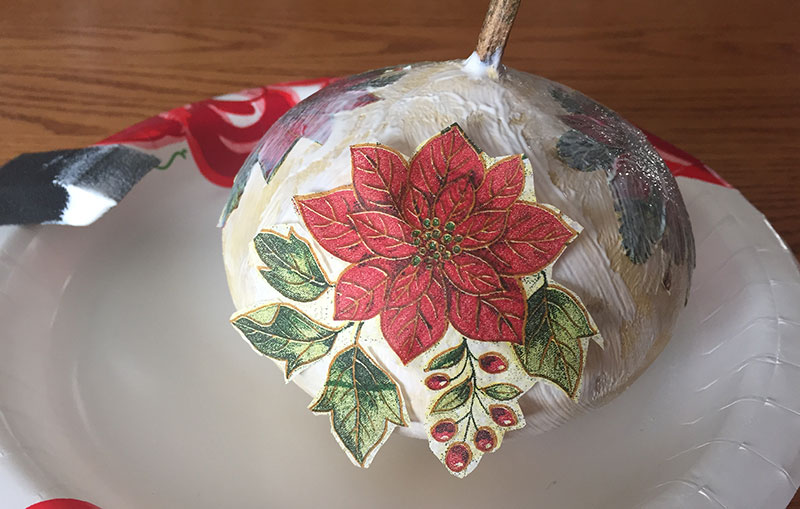
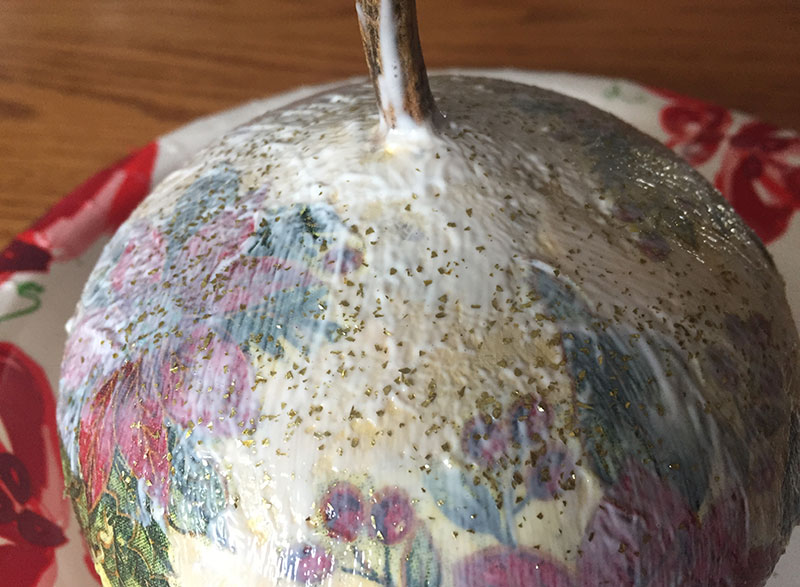
Next paint a layer of glue over each shape, again starting at the center and moving to the edges so the edges don’t fold or tear.
Continue to paint the entire gourd and stem with the glue.
Step 5: Paint a second layer of Modge Podge
Paint the entire gourd with a second layer to catch any missed spots.
Step 6: Add sparkle!
Before the second layer dries, lightly sprinkle glitter onto the gourd.
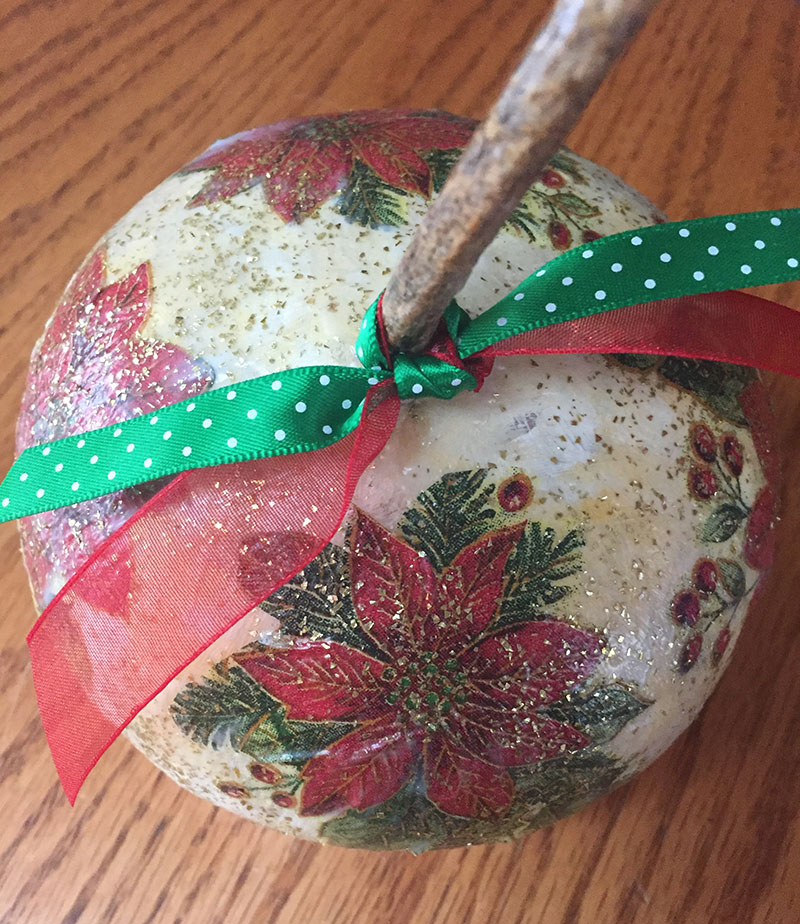
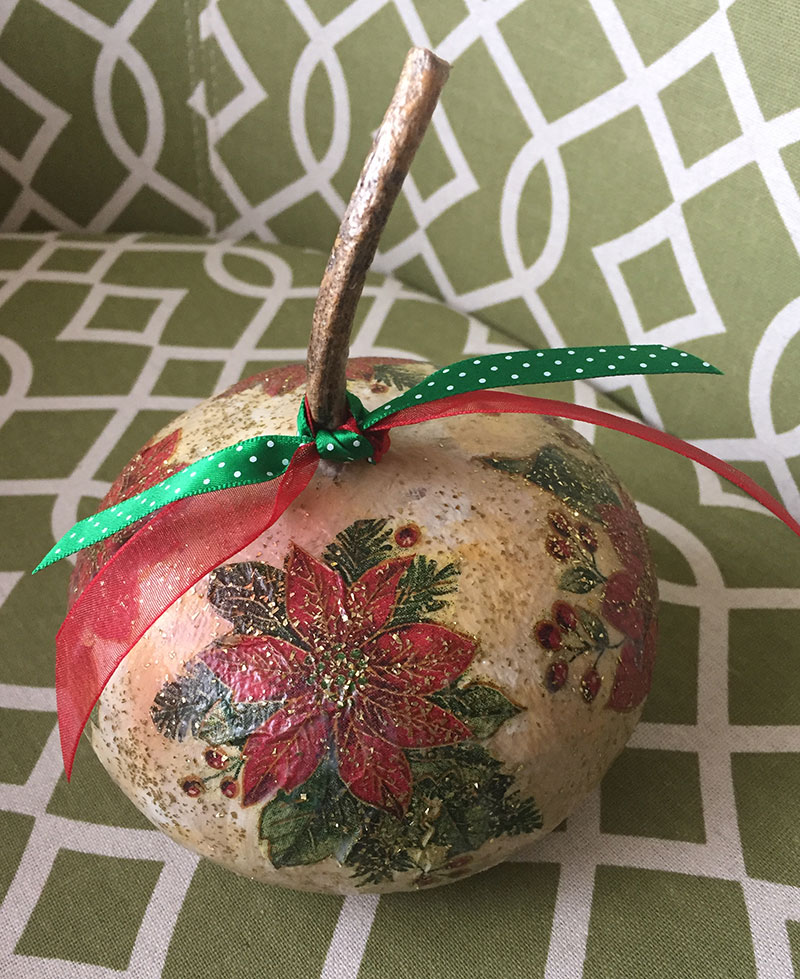
Step 7: Add embellishments if desired
Yippee! A crafty and artistic painted gourd that is so easy to make.
Bonus:
If you want to try painting your own poinsettias, try this idea.
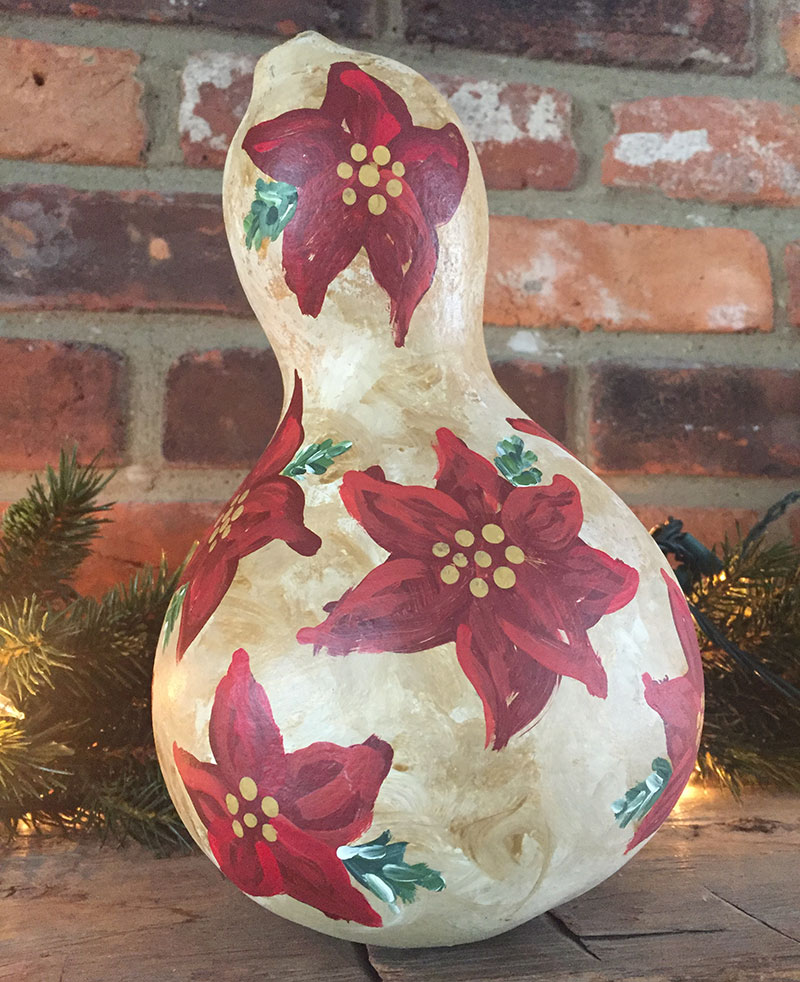
Like I mentioned above, I like using a little trick of using 3 similar colors to add dimension.
After painting the background as above, plan out your flower placement by marking the centers with a pencil. I made mine kind of evenly spaced, but you can make a garland look or anything you like.
For these poinsettias, I painted three “petals” in a triangle shape, using a small brush and lines of three different reds. (Just dip the brush in one red, paint a few lines, then dip the same brush in another red and paint a few more lines and so on…)
Next I did the same to add three more petals to make the six for the poinsettia flower.
Then I added the centers using the handle end of the brush dabbed into the gold.
You can also add other details like pine branches with the same 3 colors for one technique for the greens, and then add a little snow. And once you get comfortable with painting, you can even add some “Merry Christmas” lettering.
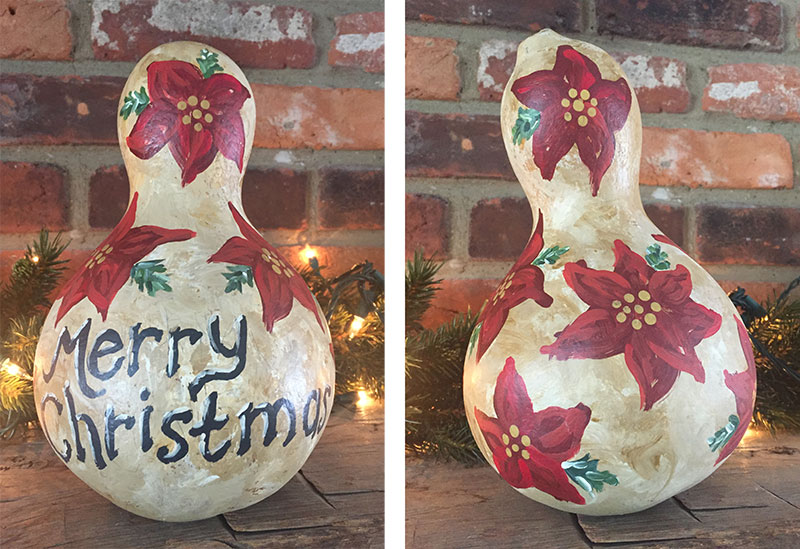
Don’t these natural beauties add some holiday cheer?
Leave A Comment