
Dollar Tree Canvas Print Easy DIY – Enhance with Frame & Embellishments
Don’t you love all those cute Dollar Tree art canvas prints found by the box load at the store? I do too, and they look especially good displayed as a set of multiples on a wall. But I also wanted to think of how to enhance them in a crafty way, and came up with a couple ideas that hopefully inspire you to give them a try!
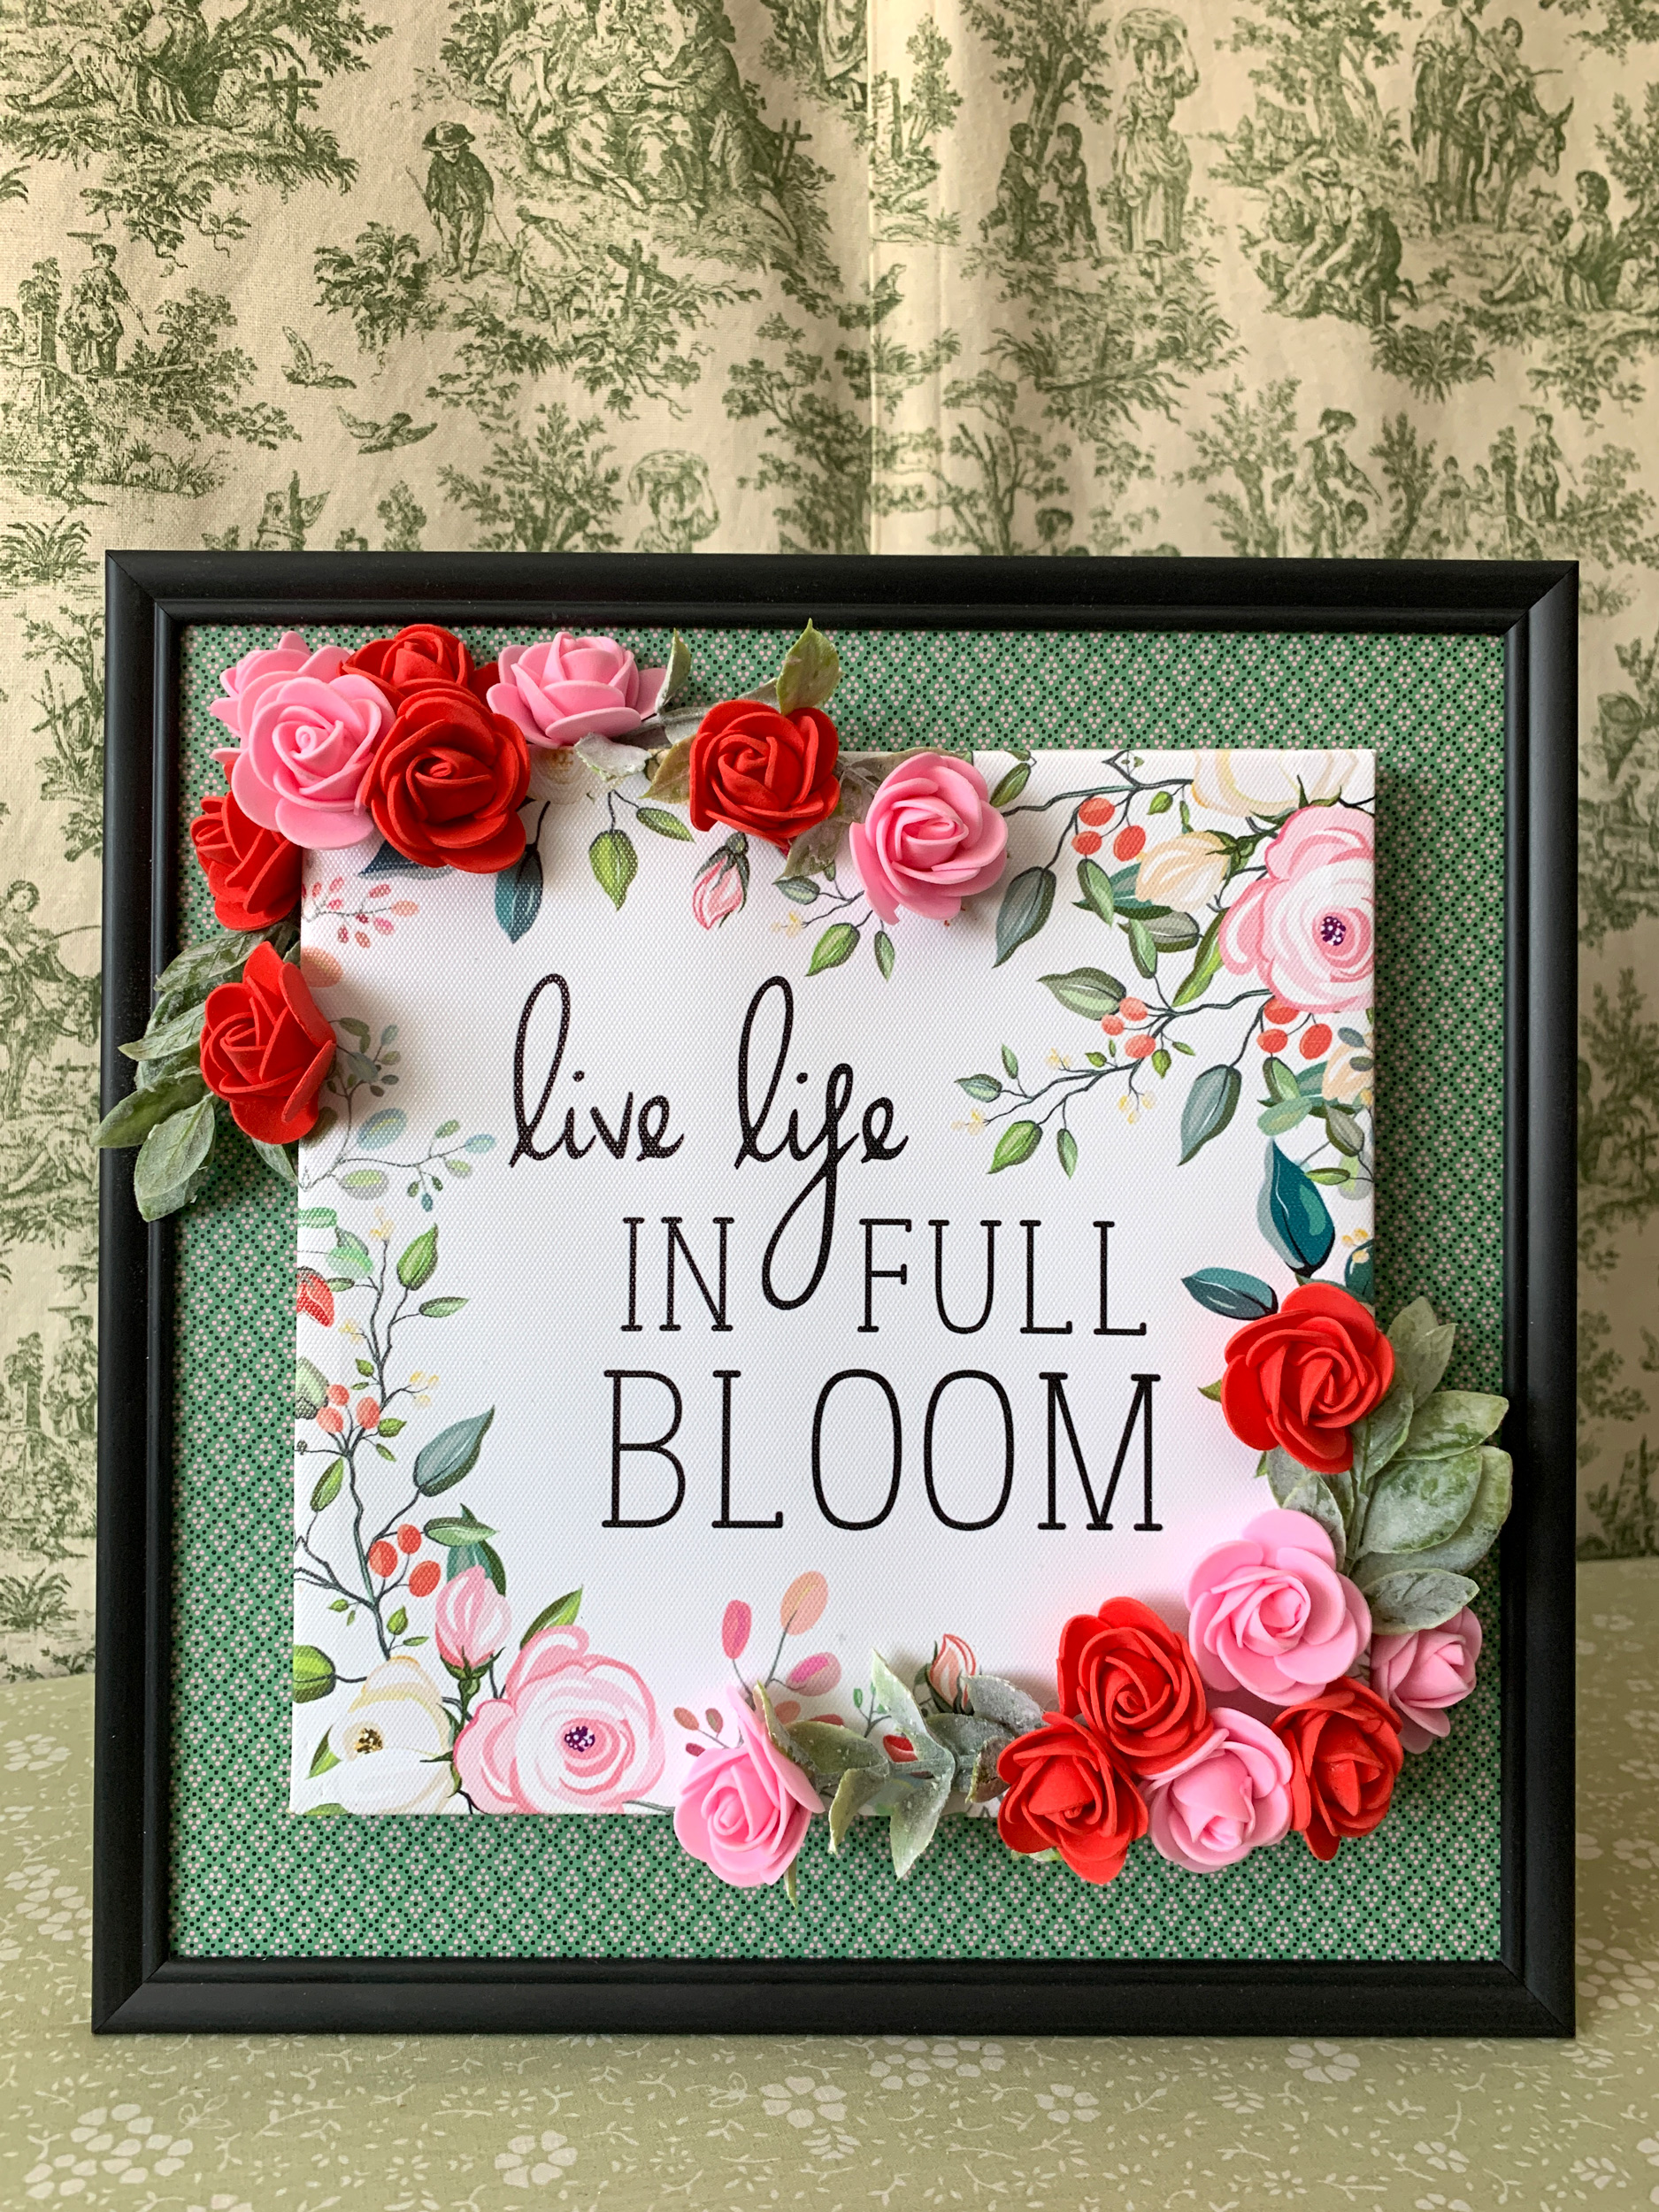
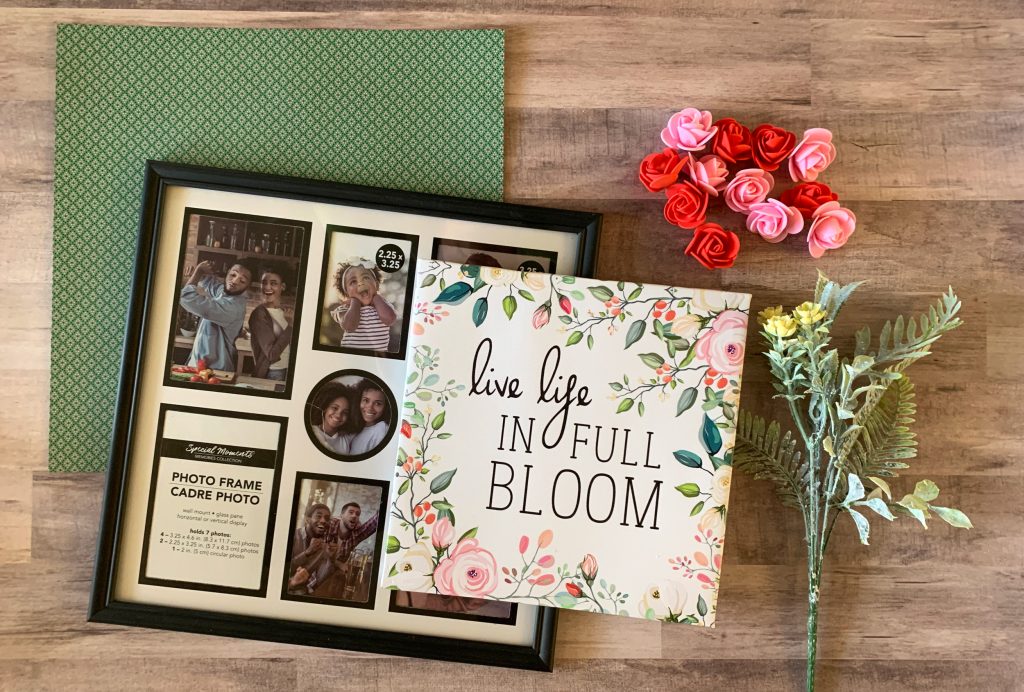
I found the perfect square frame at the Dollar Tree that is about 12 x 12 inches and thought it would be a great way to add size and structure to the canvas. (By the way – this frame is a great find on its own, and even comes with a decent cardboard mat for multiple photos.) And of course I had to use the foam roses – this time the mini versions – from the Dollar Tree Valentine’s Day craft section – I just love them! But really any artificial flowers would work great.
Supplies:
1 Dollar Tree 12 x 12 Square Frame
2 Pkgs Dollar Tree Mini Foam Roses (or other small flowers)
1 Dollar Tree Stem of Foliage (I scored the super popular frosted mini spring type, yeeesssss…..)
1 Dollar Tree Canvas Print of your choice
1 Piece of 12 x 12 inch scrapbook paper
1 Piece of 12 x 12 inch cardboard or sturdy card stock (not pictured)
Hot Glue & Large Glue Stick
To make the frame base, pull out the glass, mat and cardboard backing. Use the backing as a template and cut out a piece of card board and scrapbook paper to size. Glue the paper to the cardboard with the glue stick, adhering over all the cardboard completely. Using a glue stick helps avoid getting the paper wrinkly, because it is a dryer glue and spreads in an even coating. This will create a strong base to attach the canvas. Then reassemble the frame with the paper/cardboard on top, then the mat and glass behind, and finally the backing card board. (Keeping the glass and mat in the frame is the safest place so the glass doesn’t break. And the frame can be reused if you want to try another crafty project!)
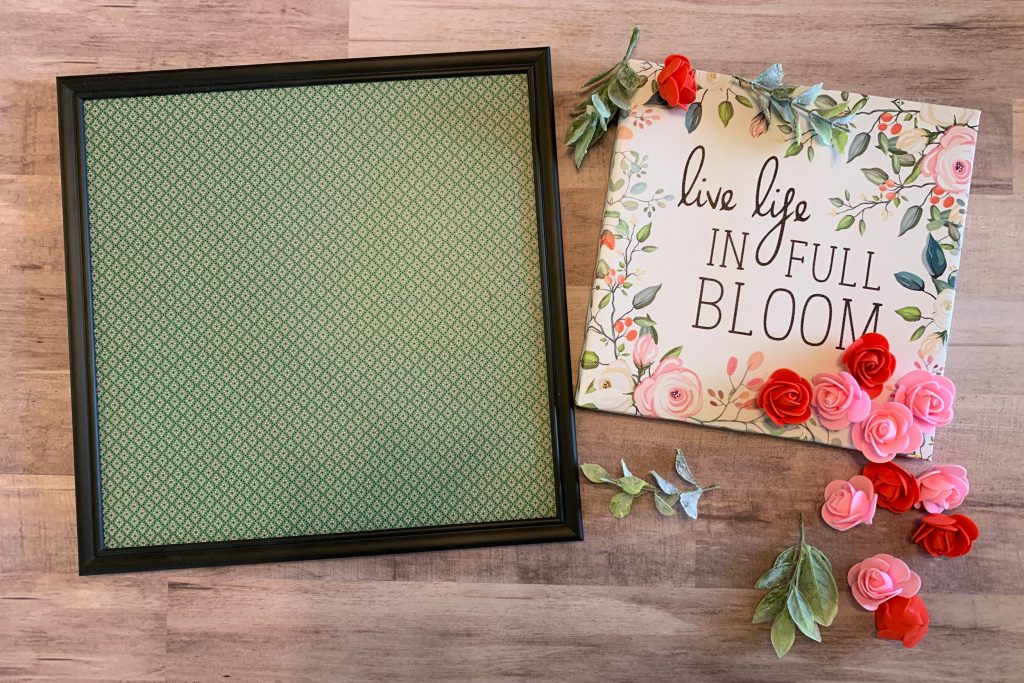
Next, remove the hanger from the back of the canvas. I used a flat head screwdriver, and it easily pulled out from the wood along the edges. Then, using hot glue, run a bead along all four sides of the back of your canvas and press onto the paper in the frame in the center. Hold for a few seconds to strongly adhere.
Next, trim off a few of the foliage stems and gather the flowers you would like to use. Place them on your canvas, until you have an arrangement you like. For this particular image, I placed the flowers around the message to repeat the printed flowers and add a 3D effect. I even place some just off the canvas so they are “spilling” over the edge into the mat area.
Other ideas for different prints are to create a flower crown on the head of a portrait or animal close up image, or to add more flowers to a vase image. Even if you like a print that doesn’t include flowers, you can choose other types of embellishments such as coins, keys, gravel, beads, etc to add a similar 3D effect.
Once you have the arrangement set the way you like it, carefully pick up each item and add hot glue and replace in the same spot. I used “multi-temp” glue sticks and these did not melt the foam flowers or the canvas. Be a cautious when pressing items around the middle of the canvas since there is no wood backing in those areas.
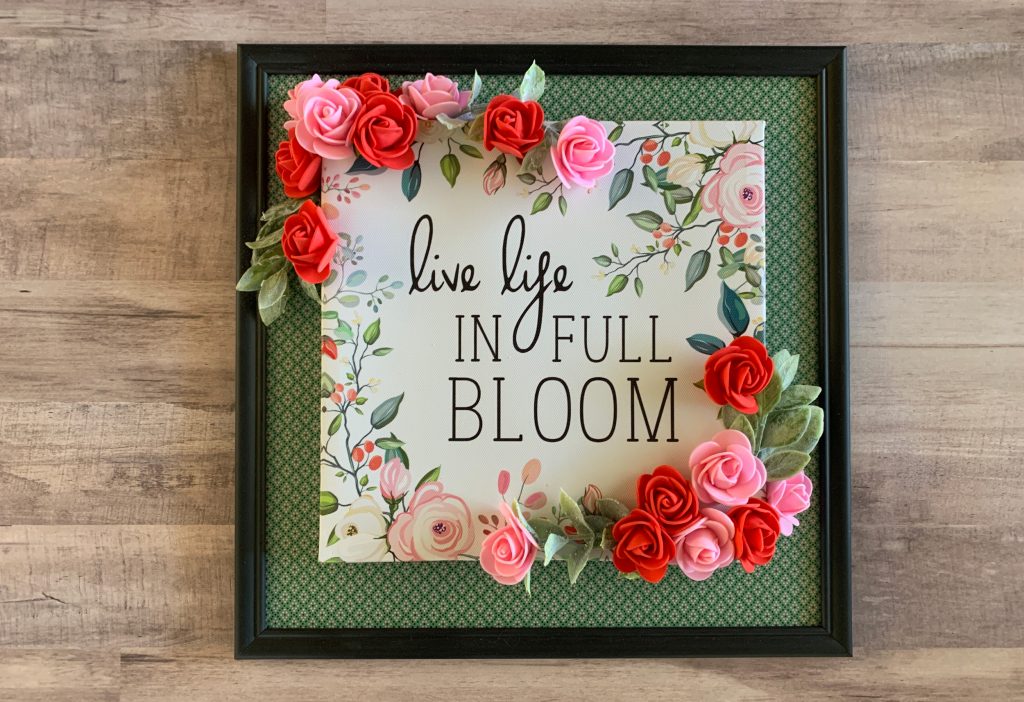
I am really pleased how this crafty project turned out, and it was so easy to create. This will be a great piece to have in a foyer or above a desk for positive vibes to start each day.

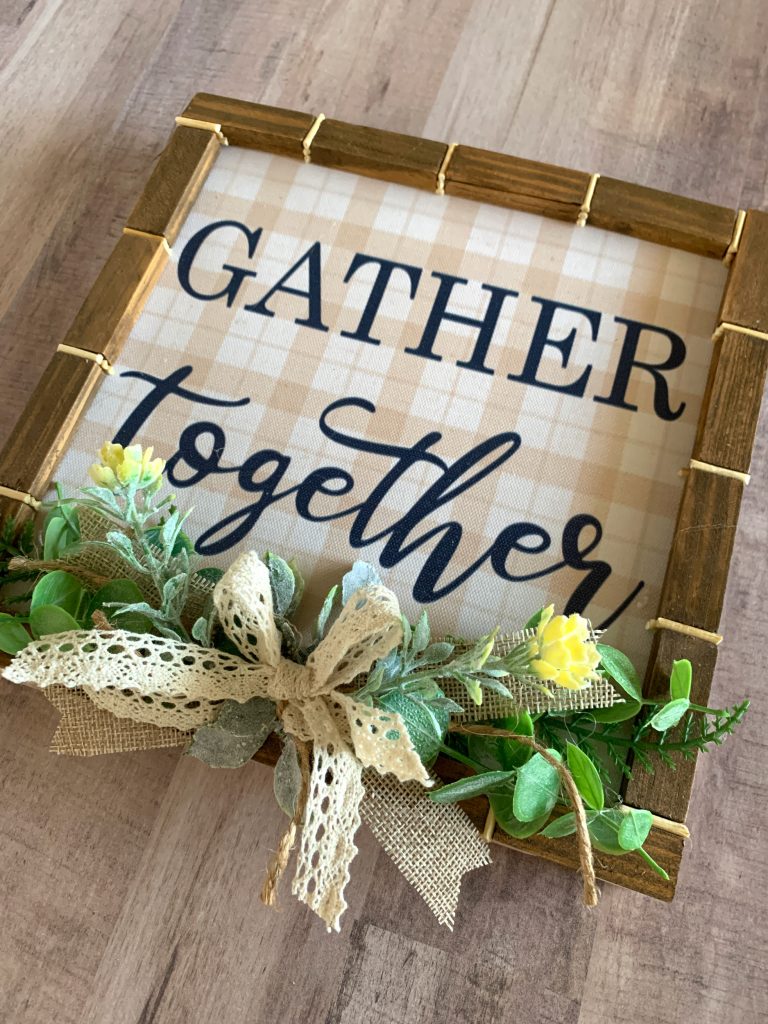
Bonus Idea: Using Dollar Tree Tumbling Blocks for a Frame!
Here’s another idea using the infamous Dollar Tree Tumbling Blocks. Many Dollar Tree DIYers love these blocks, so I thought I should give them a try for an alternate crafty frame.
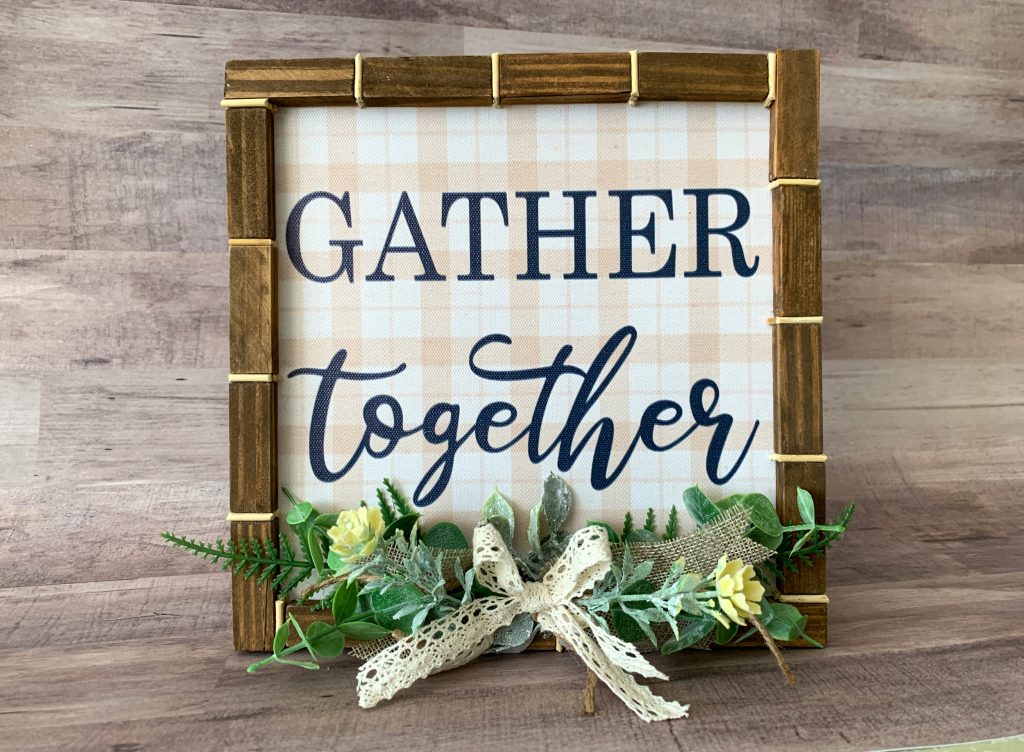
I figured out that four blocks fit around each side of the canvas with a tiny bit of space between each. So first I stained 16 blocks with a water-based antique finishing wax, by painting on the wax with a foam brush, rubbing off the excess, then letting them dry. In the meantime, I cut a bunch of small skewer sticks into pieces the same width as the blocks with wire cutters. (These were actually leftover sticks I cut off Dollar Tree Easter glitter egg picks.) Each area needed 3 pieces to fill the space, and I left them natural color for contrast.
To assemble, I hot glued the blocks around the canvas edge, using a skewer stick to measure the spacing between each. Then I used a little white glue to stack the 3 skewer pieces between the blocks.
Lastly, I added some foliage, flowers and a bow to create pretty accent. The eucalyptus is from Walmart, and the fern leaves and mini yellow flowers are from Dollar Tree. The burlap, lace and twine to make the bow are all my favorite Dollar Tree ribbons to add a natural touch.
I just love the eclectic feel these embellishments add to this canvas, and it would look great near a macrame plant holder or wicker decor.
I hope you are inspired to make your own embellished canvas – just have fun and get crafty!
Leave A Comment