
Dollar Tree Daisy Wreath Tutorial – So Easy and Pretty!

I’ve been crafting a few Dollar Tree wreaths to sell at a little Spring Fling craft show in my area, and I’m really having fun putting different flower types and color combinations together. I’ve come up with somewhat of a formula to get the most out of my supplies (only about $10!), and I thought I’d share this style in a super easy DIY tutorial.
Supplies:
1 Dollar Tree wreath form (14 inches)
2 pipe cleaners (cut into thirds)
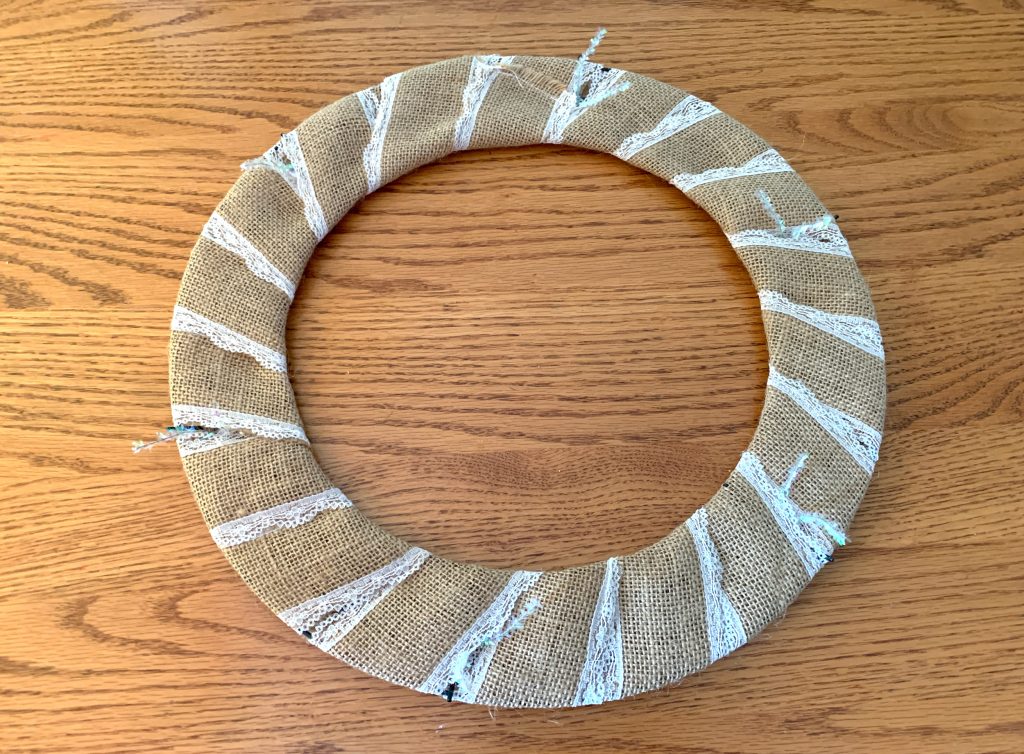
2 Dollar Tree rolls of wide ribbon (I chose burlap types)
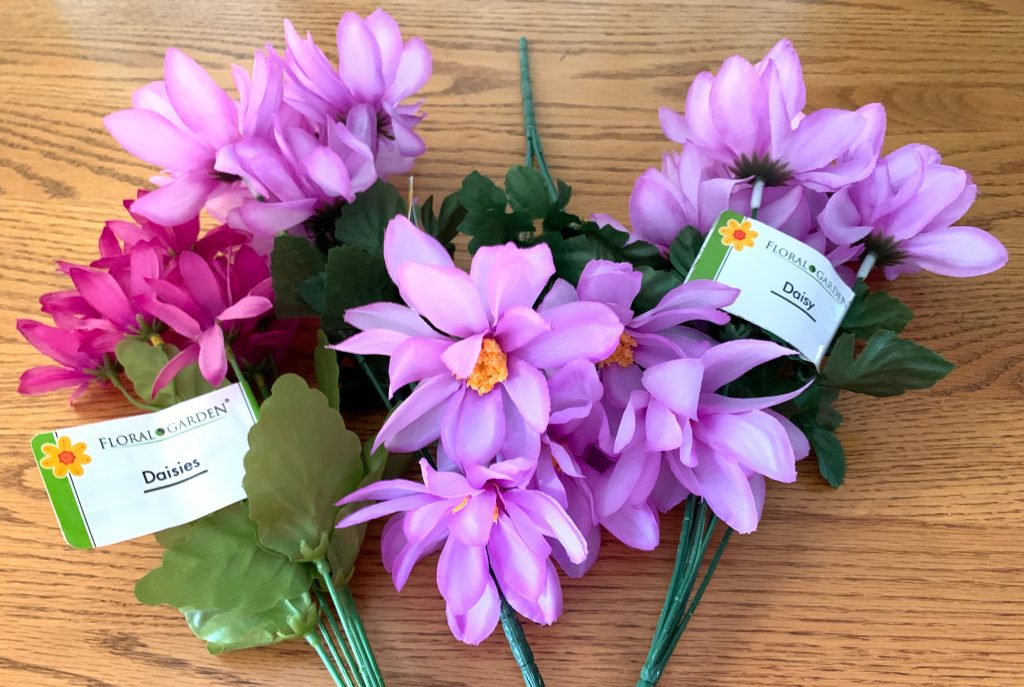
3 or 4 Dollar Tree stems of large flowers (such as dahlias or daisies)
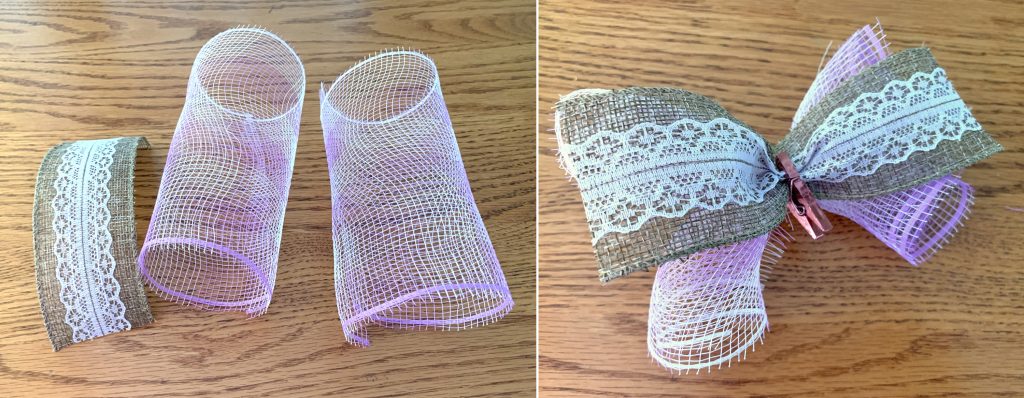
1 Dollar Tree mesh roll
Hot Glue Gun, Wire Cutters
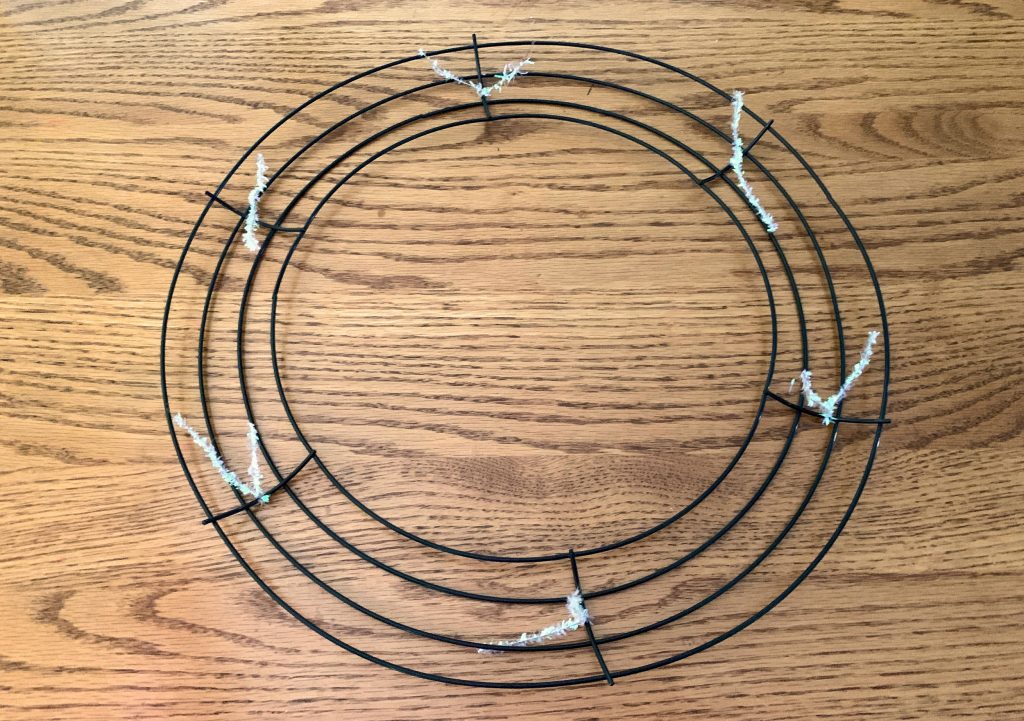

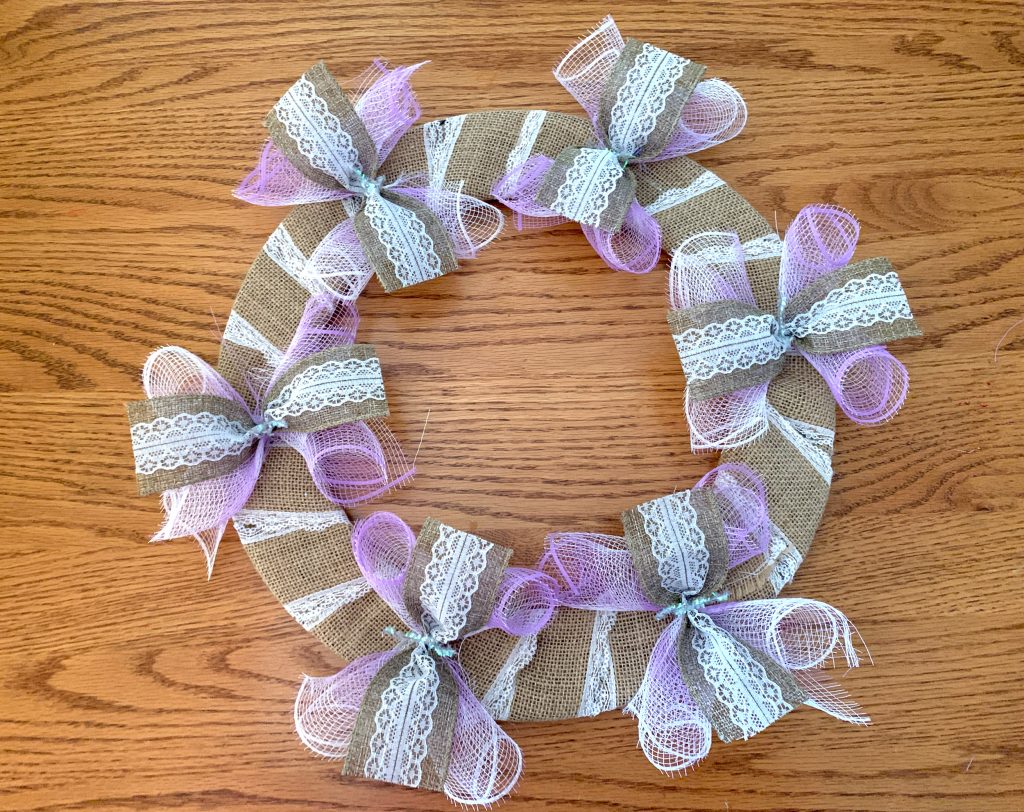
As shown in the image above, twist pipe cleaners in six spots around the wreath form, keeping the ends up for adding the mesh later. Wrap the wreath form with the wide ribbon, tacking down the beginning with hot glue and a few additional places while wrapping. Make sure the pipe cleaners are still peeking through. Three yards works perfectly to wrap the entire form.
Make the mesh/ribbon bundles by cutting two pieces of mesh about 10 inches and the ribbon 6 inches long. Roll the mesh into tubes and create an X with the mesh and add the ribbon on top. Repeat 6 times. Squeeze in the center and add to the wreath at each pipe cleaner, twisting tightly.
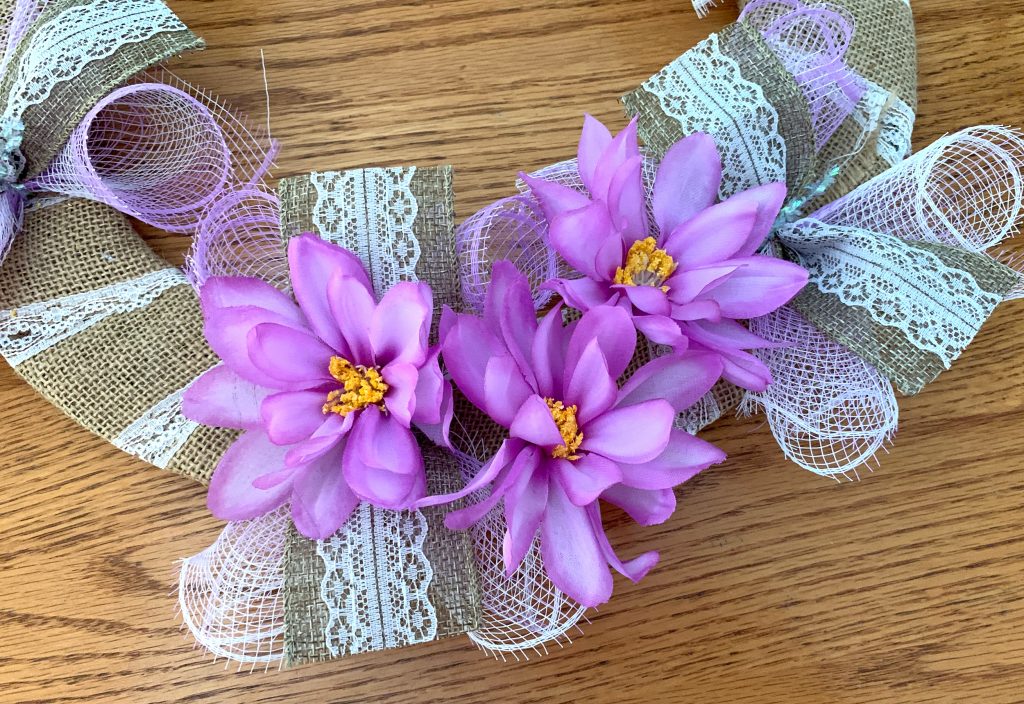
Pull the flowers of their stems. I used a total of 18 large flowers to fill the wreath by gluing two between and one on top of each mesh bundle.
Continue all the way around the wreath.
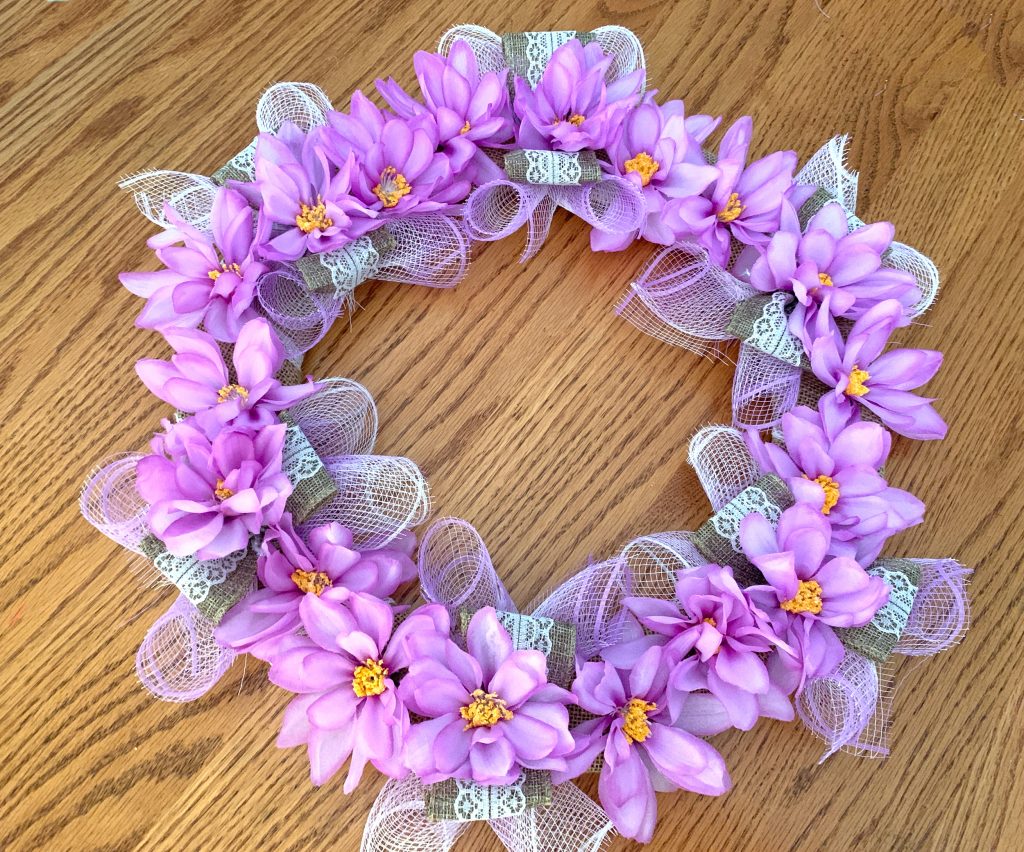
Fill in extra spaces with other smaller flowers and leaves from the flower stems.

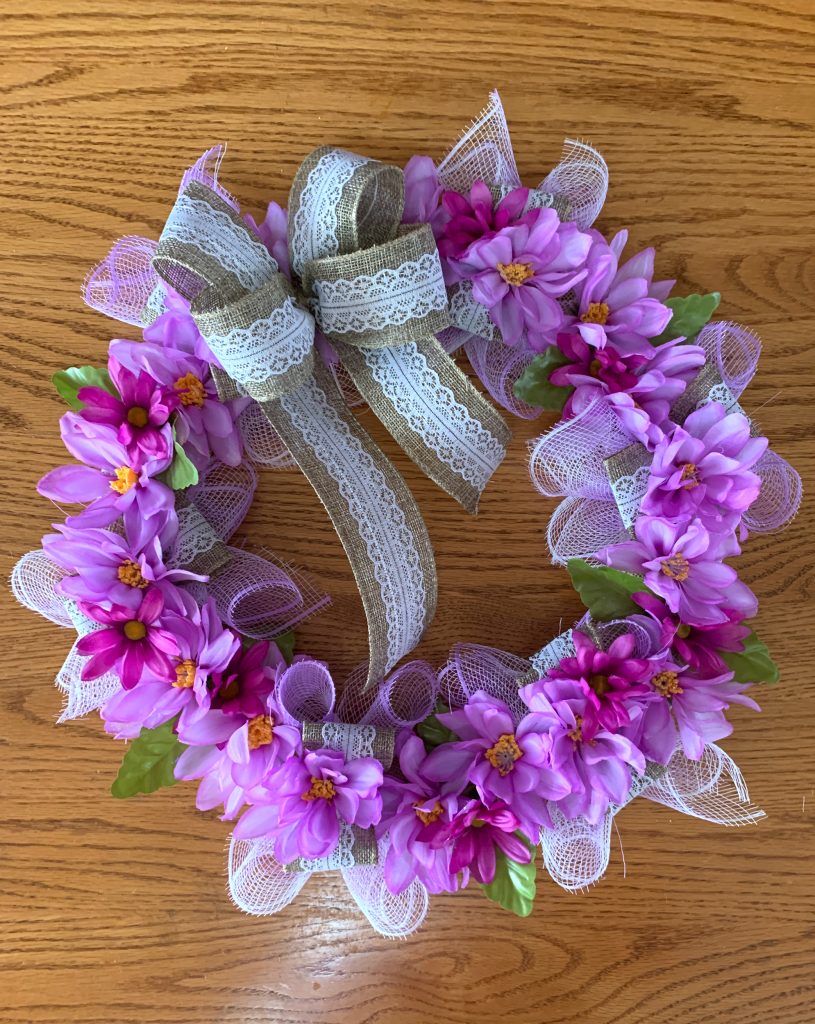
Add a matching ribbon bow and it’s ready for display to add a colorful touch to any decor!
Leave A Comment