
Free Motion Quilting in Five Steps – Yes You Can!
I have been sewing since my 7th grade home economics class, and I’ve always tried to have my stitching be “perfect” with straight lines and even stitches. So as I made more quilted projects over the years, I would only add lines that I could make with my regular presser foot and selected stitch length. My pieces seemed to lack the personal touch I saw in quilts lovingly stitched with free motion.
Recently I’ve been making items to sell in our church holiday bazaar and to give as gifts for friends and teachers. Most of the time they are smaller projects like wall hangings, placemats and fabric bowls. I found these are great opportunities to experiment with free motion quilting!
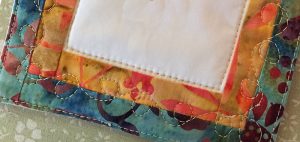
If there are uneven stitches or wonky shapes, they are overtaken by the beauty of the overall texture. Even if the worst happens, the mistakes are not on a large piece that has many hours of work in it.
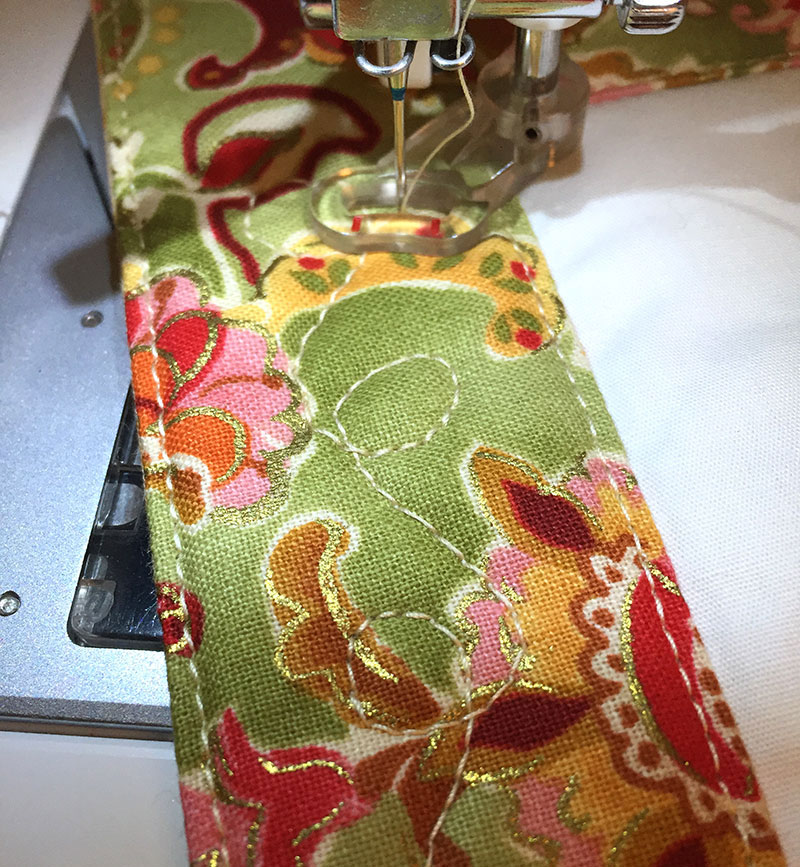
The first step is to get a free motion foot for your sewing machine. And before you start worrying you can’t try this without an expensive long arm machine, let me share that I use a simple Singer. I bought mine years ago and I’ve gotten to “know” my little Singer and it works well for me. I do also have a sewing table that my Singer fits in so I have a larger level area to move my fabric.
The second step is to create a few test quilt sandwiches with fabric scraps and extra batting. A good size is about 8 x 10 inches. That way you can try filling rectangle spaces or creating longer lines of quilting. I build mine with 100% cotton fabric used for quilting and Warm & Natural cotton batting.
The third step is to check the tension so the stitches on the top and bottom of the quilt look good. I always have to adjust mine when I switch from regular stitching and free motion. If the tension is too loose on the top, the bobbin thread is pulled away from the shapes on the bottom and looks sloppy.
The fourth step is to practice. To start stitching from a spot other than the edge, put the needle down and up by hand one time and pull the bobbin thread up to the top of the fabric with the needle thread. Hold both threads taught and make a few micro stitches to tack the beginning without using reverse or knots. Three or four stitches is all you need. Then as you start stitching, focus on keeping the speed slow and steady and try to match it with the movement of the fabric sandwich under the needle.
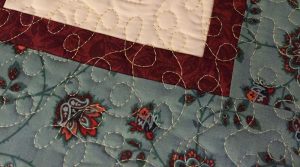
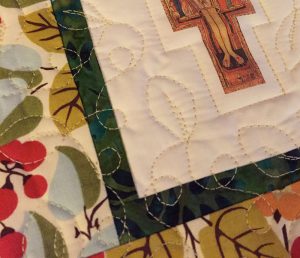
The fifth step is the fun part! Try some simple patterns of circles, swirls, or waves. You can experiment with shapes like leaves or letters.
To finish stitching, make a few micro stitches and trim.
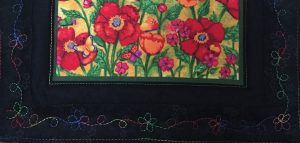
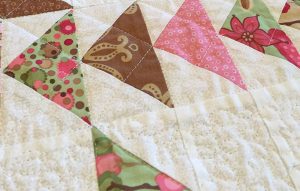
Trying free motion quilting has really helped me let go of trying to make my sewing perfect. It has given me more confidence and it has added personality to my pieces. It can highlight part of a quilt block or an image on the fabric. The possibilities are endless!
These are the steps I’ve used to begin my journey of free motion quilting. There is so much information available, and I’m excited to keep learning and take my quilting to the next level. I hope it inspires you to try it too!
Leave A Comment