
Fun Fleece Circle Scarf
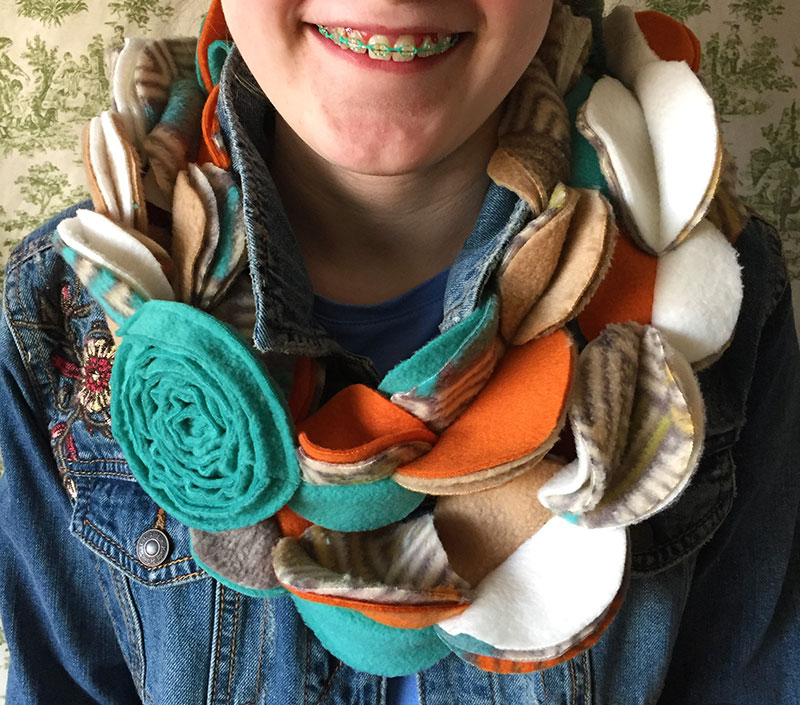
Chase away the winter doldrums with a Fun Fleece Circle Scarf. Say that ten times! Fun right?
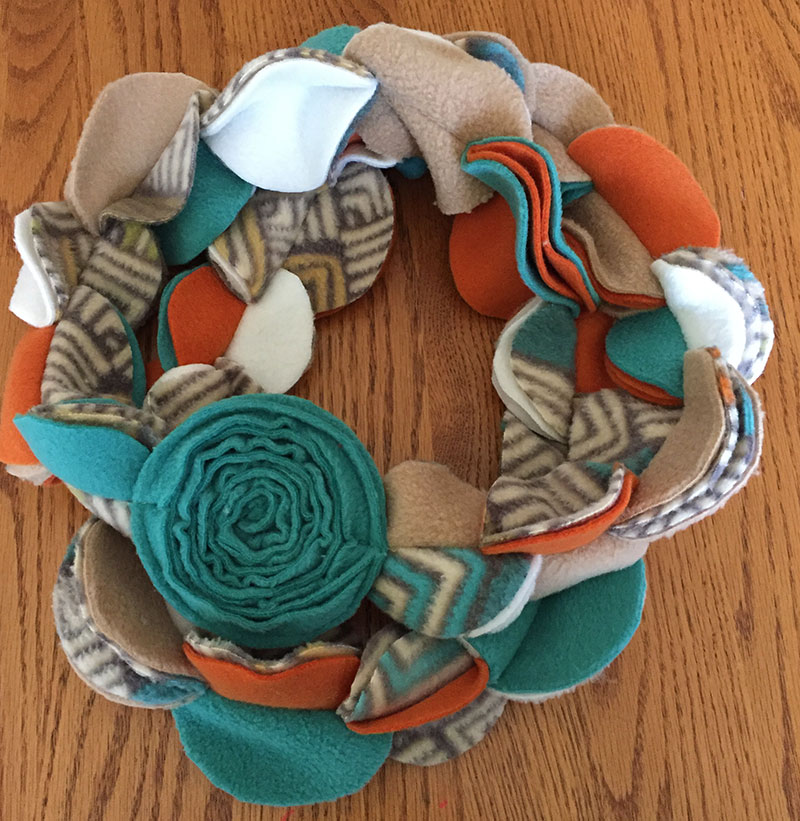
I found this idea from a friend who was wearing this cute colorful scarf and so I crafted my own version to share. The final length is approximately 62 inches, and it has Velcro on the ends so it can convert from a hanging scarf into an infinite scarf.
Bonus idea: Add extra cheer by matching your scarf colors to your braces bands! 🙂
Supplies:
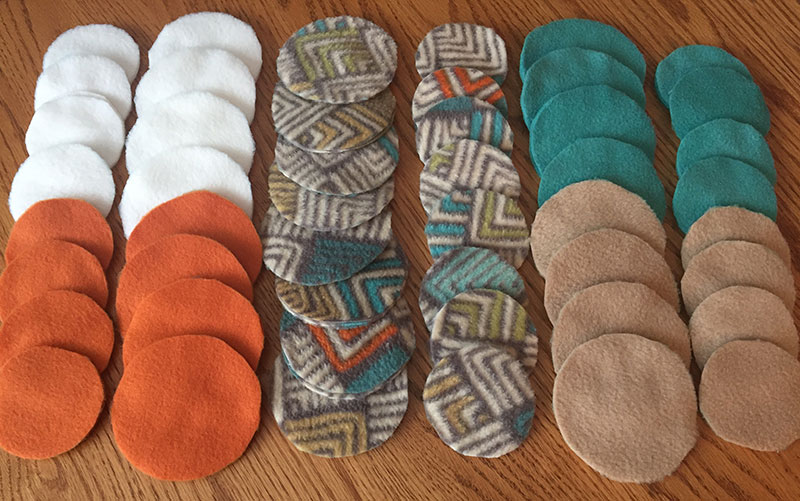
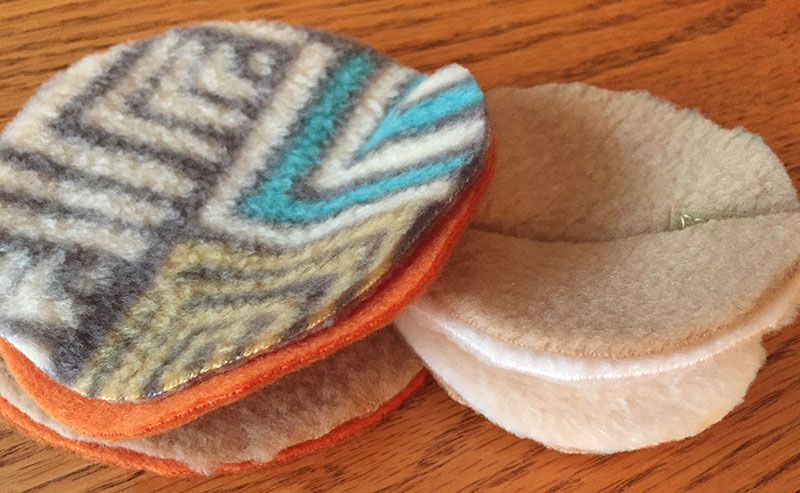
1/4 yard each of 4 solid and 1 print fleece in coordinating colors
2 squares of 1/2 inch Velcro
2 glasses or circle templates (3 inches & 4 inches)
Thread and good fabric cutting scissors

Preparing the Fleece:
(Note when cutting out your circles, keep your fleece folded in half, so you are cutting through two layers at once.)
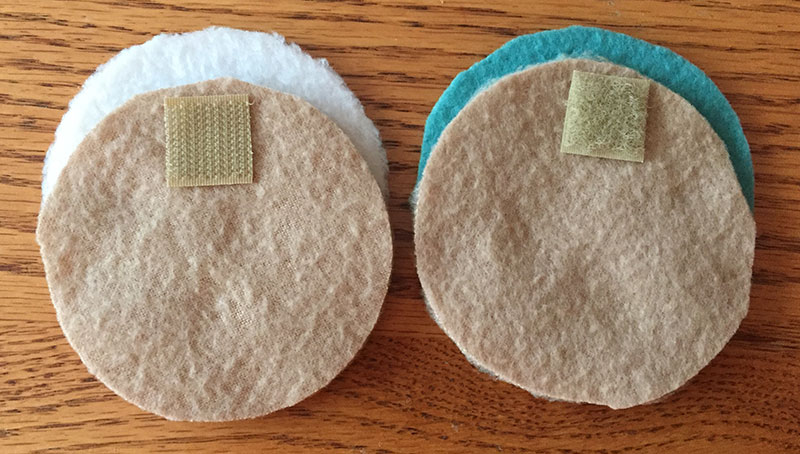
Trace and cut 4 large circles and 4 small circles of each solid fleece. (double layer)
Trace and cut 8 large circles and 8 small circles of the print fleece. (double layer)
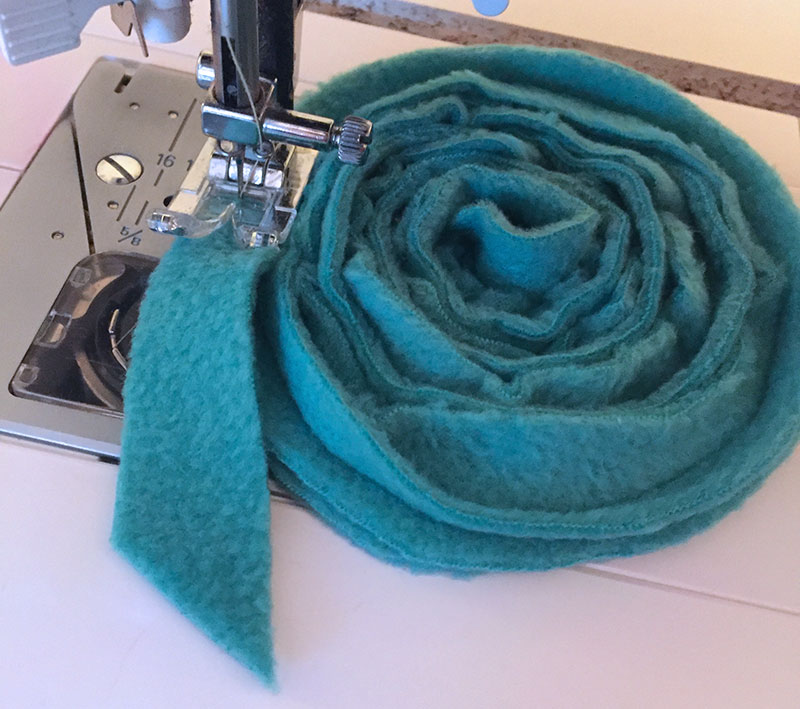
Pick one solid color fleece for the flower, and cut out one large circle (double layer) and one strip 3/4 inch by 40 inches.
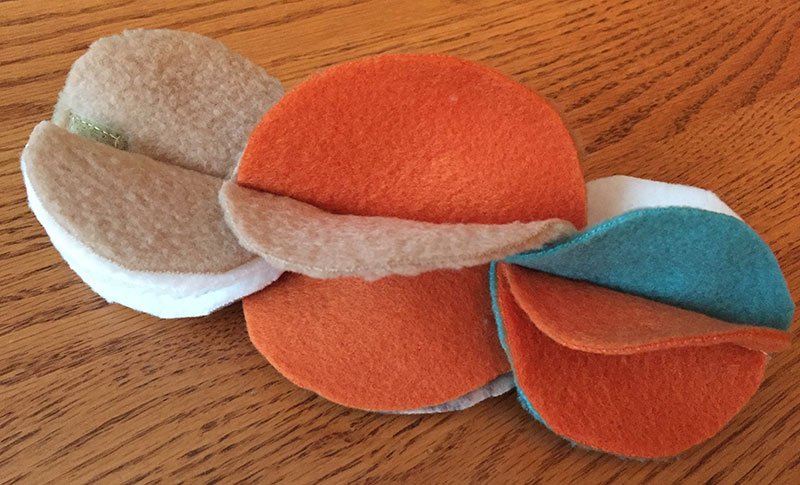
You should have 48 large circles and 48 small circles, plus 2 large circles and a strip for the flower.
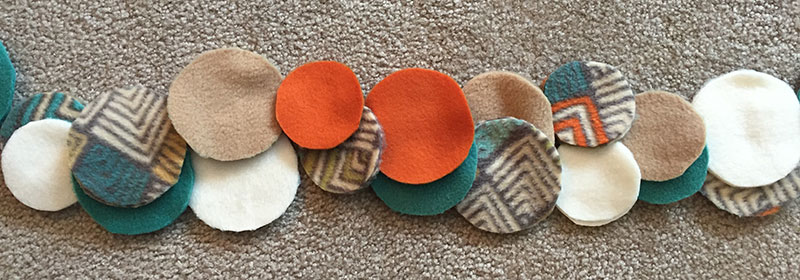
Arrange the scarf by lining up the fleece circles to create the look you want. You can line them up in a pattern or in a random way. Each stack along the line will have 4 layers. You should have 12 large and 12 small stacks, plus one 2 layer stack for the flower.

Sewing the Fleece:
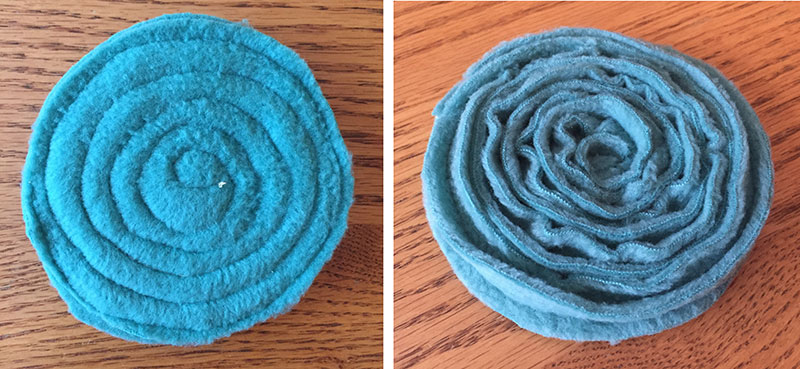
To make the flower, start at the center of the flower and sew the strip onto the circle in a spiral pattern. Sew along the middle of the strip in a tight spiral, taking care not to sew over last inner spiral as you sew. Cut the end at an angle so it blends in.
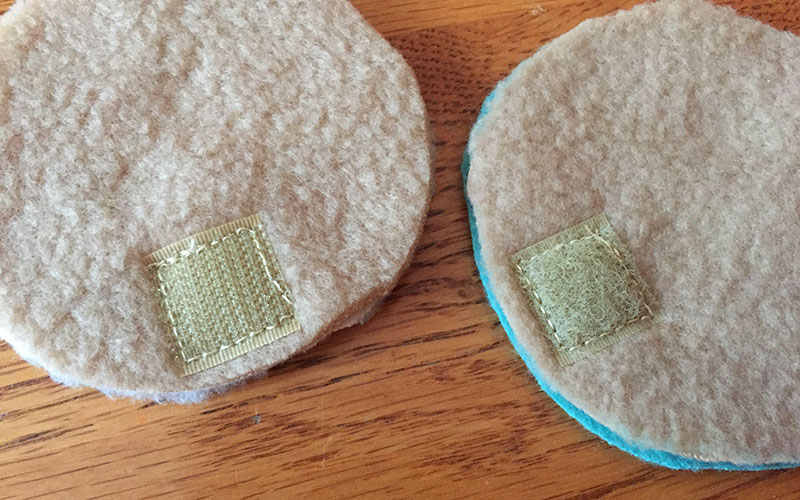
Start with the first stack of 4 circles. Divide the stack into two circles each, with right sides facing out. Place one side of one square of the Velcro close to the edge of one stack. Sew around the square. Repeat with the other side of the Velcro onto the other stack. Velcro the two stacks together, and sew along the diameter of the circles, starting at the Velcro to the opposite edge, back-stitching at both ends.
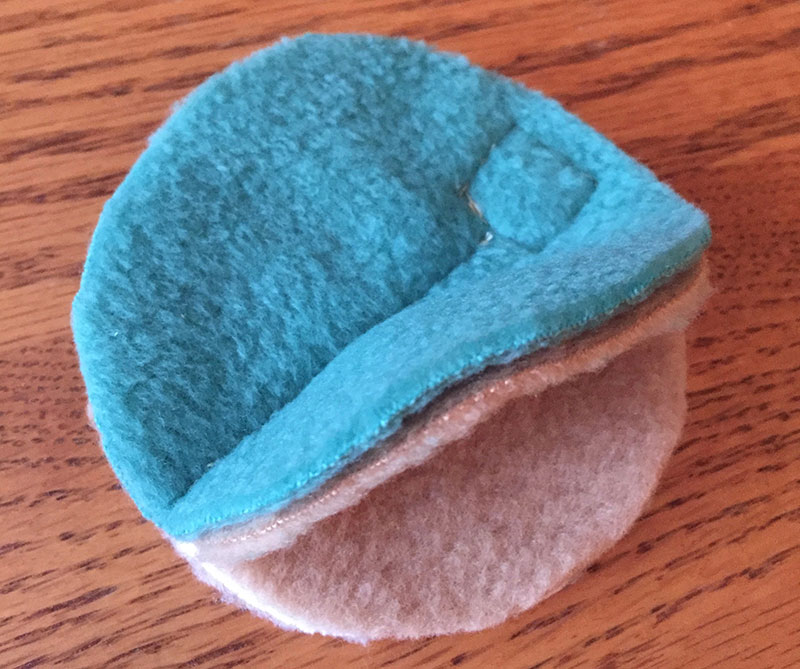
Open the circle stack the opposite way, so the stitching is inside. Using the second stack, sew down the diameter of the stack part way. Insert the first stack between the layers of the second stack, lining up the diameter of the first so the new stitching will go along the indent. Continue sewing to the end of the second stack of circles and back-stitch.


Repeat this step again by sewing along the diameter of the third stack, open the second stack so the stitches are in the inside and insert into the third stack, aligning the diameters, and finish sewing.
Continue in the same manner with all the stacks, checking to see each stack of two has the fleece right sides out, and the colors are aligned the way you want. Insert the flower as the seventh stack, sewing it on top of the stack before it and after it, about 1/2 inch.
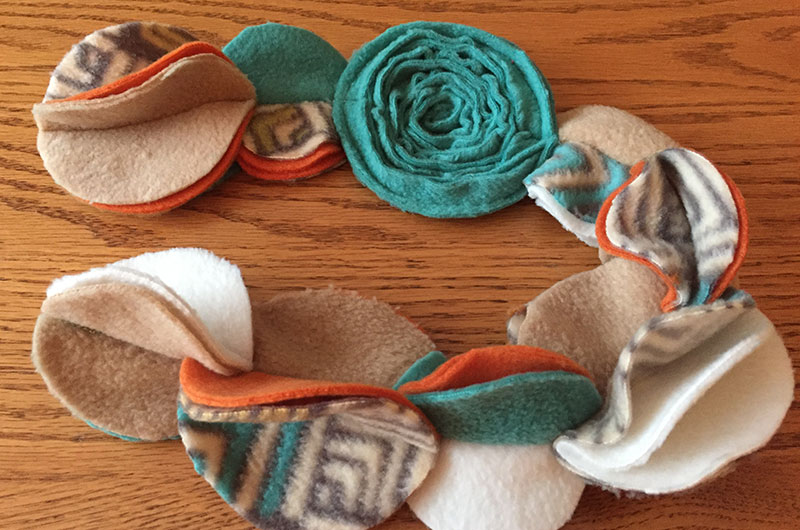
To finish the scarf, sew the Velcro as above to the last stack of circles, sew the 4 layers together, and open and sew into the scarf.
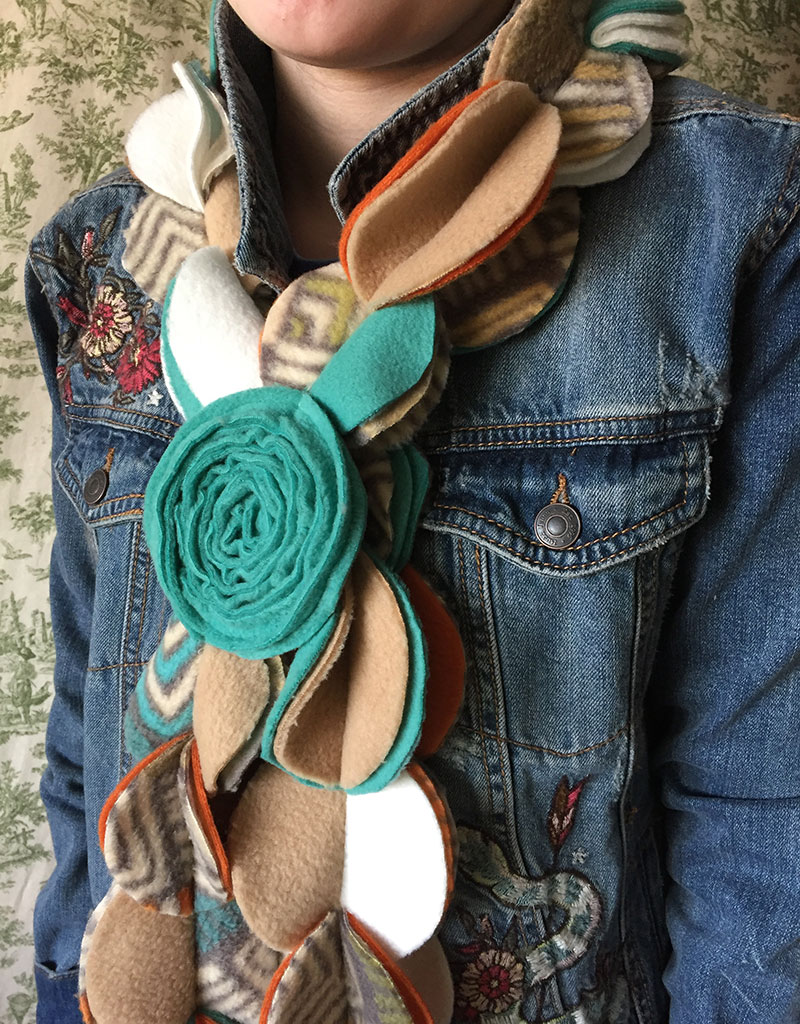
Keep the chill away and look cheerful at the same time – take that winter!

Leave A Comment