
How to Sew Reusable Sandwich Bags
As the school year is finishing up for my kids and I’m helping them make their lunches, I think about all plastic sandwich bags we’ve used and wonder how could I make reusable lunch bags.
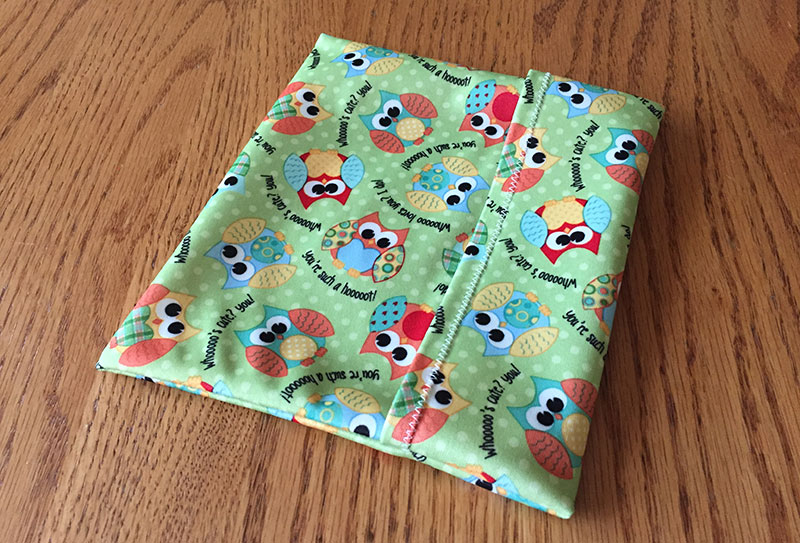
Before you think about the potential of ickiness with kids / food / reusing bags, think of cleaning them as you do the kids’ lunch bags. Either turning them inside out and rinsing with soapy water and drying, or run them through the wash. The pattern I created uses French seams to help avoid food from getting caught in fabric folds. I also don’t use any Velcro or other fasteners, and use a fold over style to keep it simple.
I used fabric called PUL (Polyurethane Laminate) waterproof fabric that has a laminate coating on one side. Two of the available brands are Babyville and Eco-Pul. If you are concerned about food safety with this type of fabric, both companies have statements online you can read to learn more.
Here’s my crafty sandwich bag pattern:
Supplies: 1/4 yard PUL fabric, polyester thread in white
1. Wash and dry the fabric, using the low setting for drying.
2. Cut a rectangle 16 x 8 inches.
Since the fabric is 64 inches wide (Babyville brand), you should be able to get four pieces out of 1/4 yard to sew up a set of four bags.

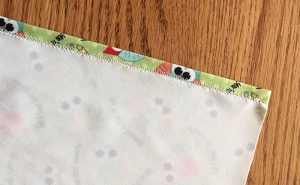
3. Fold the short ends of the rectangle 1/4 inch and iron.
Note for ironing: This fabric will melt with a hot iron, especially the white laminate side. Use the iron on a medium setting and use a scrap of cotton fabric on top of the PUL fabric.
4. Sew a small zigzag stitch along end seams.
Note for sewing: The fabric may be hard to run through your sewing machine because of its laminate coating and may need coaxing. I also start a little away from the edge, hand turn the needle a few stitches to get it started and use a longer stitch length. Another option is to add a piece of tissue paper below the fabric each time and rip it off the stitches after sewing.
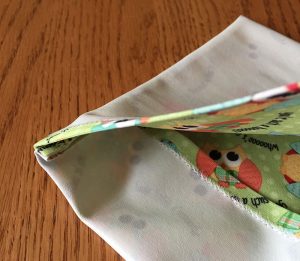
5. Fold the fabric wrong side together, leaving 2 1/4 inches overhang on one end.
6. Sew a 3/8 inch seam on both sides, starting at the overhang to make the starting stitches easier.
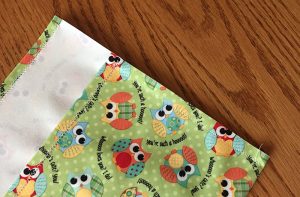
7. Fold the overhang back onto the body of the bag and stitch again.
This will make the fold over top.
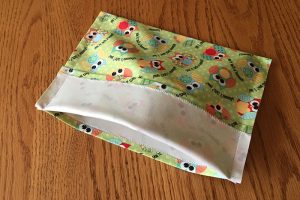
8. Trim the seams to 1/8 inch.
9. Turn the bag wrong side out, poke out corners, and lightly iron seams.
10. Sew 1/4 inch seams on each side, making sure the first 1/8 inch seam allowance is enclosed in the second seam.
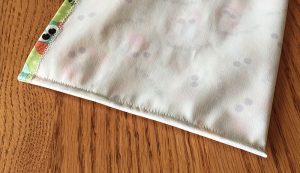
11. Turn bag right sides out and lightly iron flat.
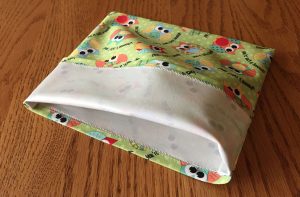
Flip fold over to enclose top.
Ta Da! A cute and crafty reusable sandwich bag.
Matilda Loredo | 6th Jul 23
Make these for grandkids. Easy to make
Daughter in law loves then too