
Simple Travel Pillow Tutorial – Great for Scout Troops and Travel Groups!
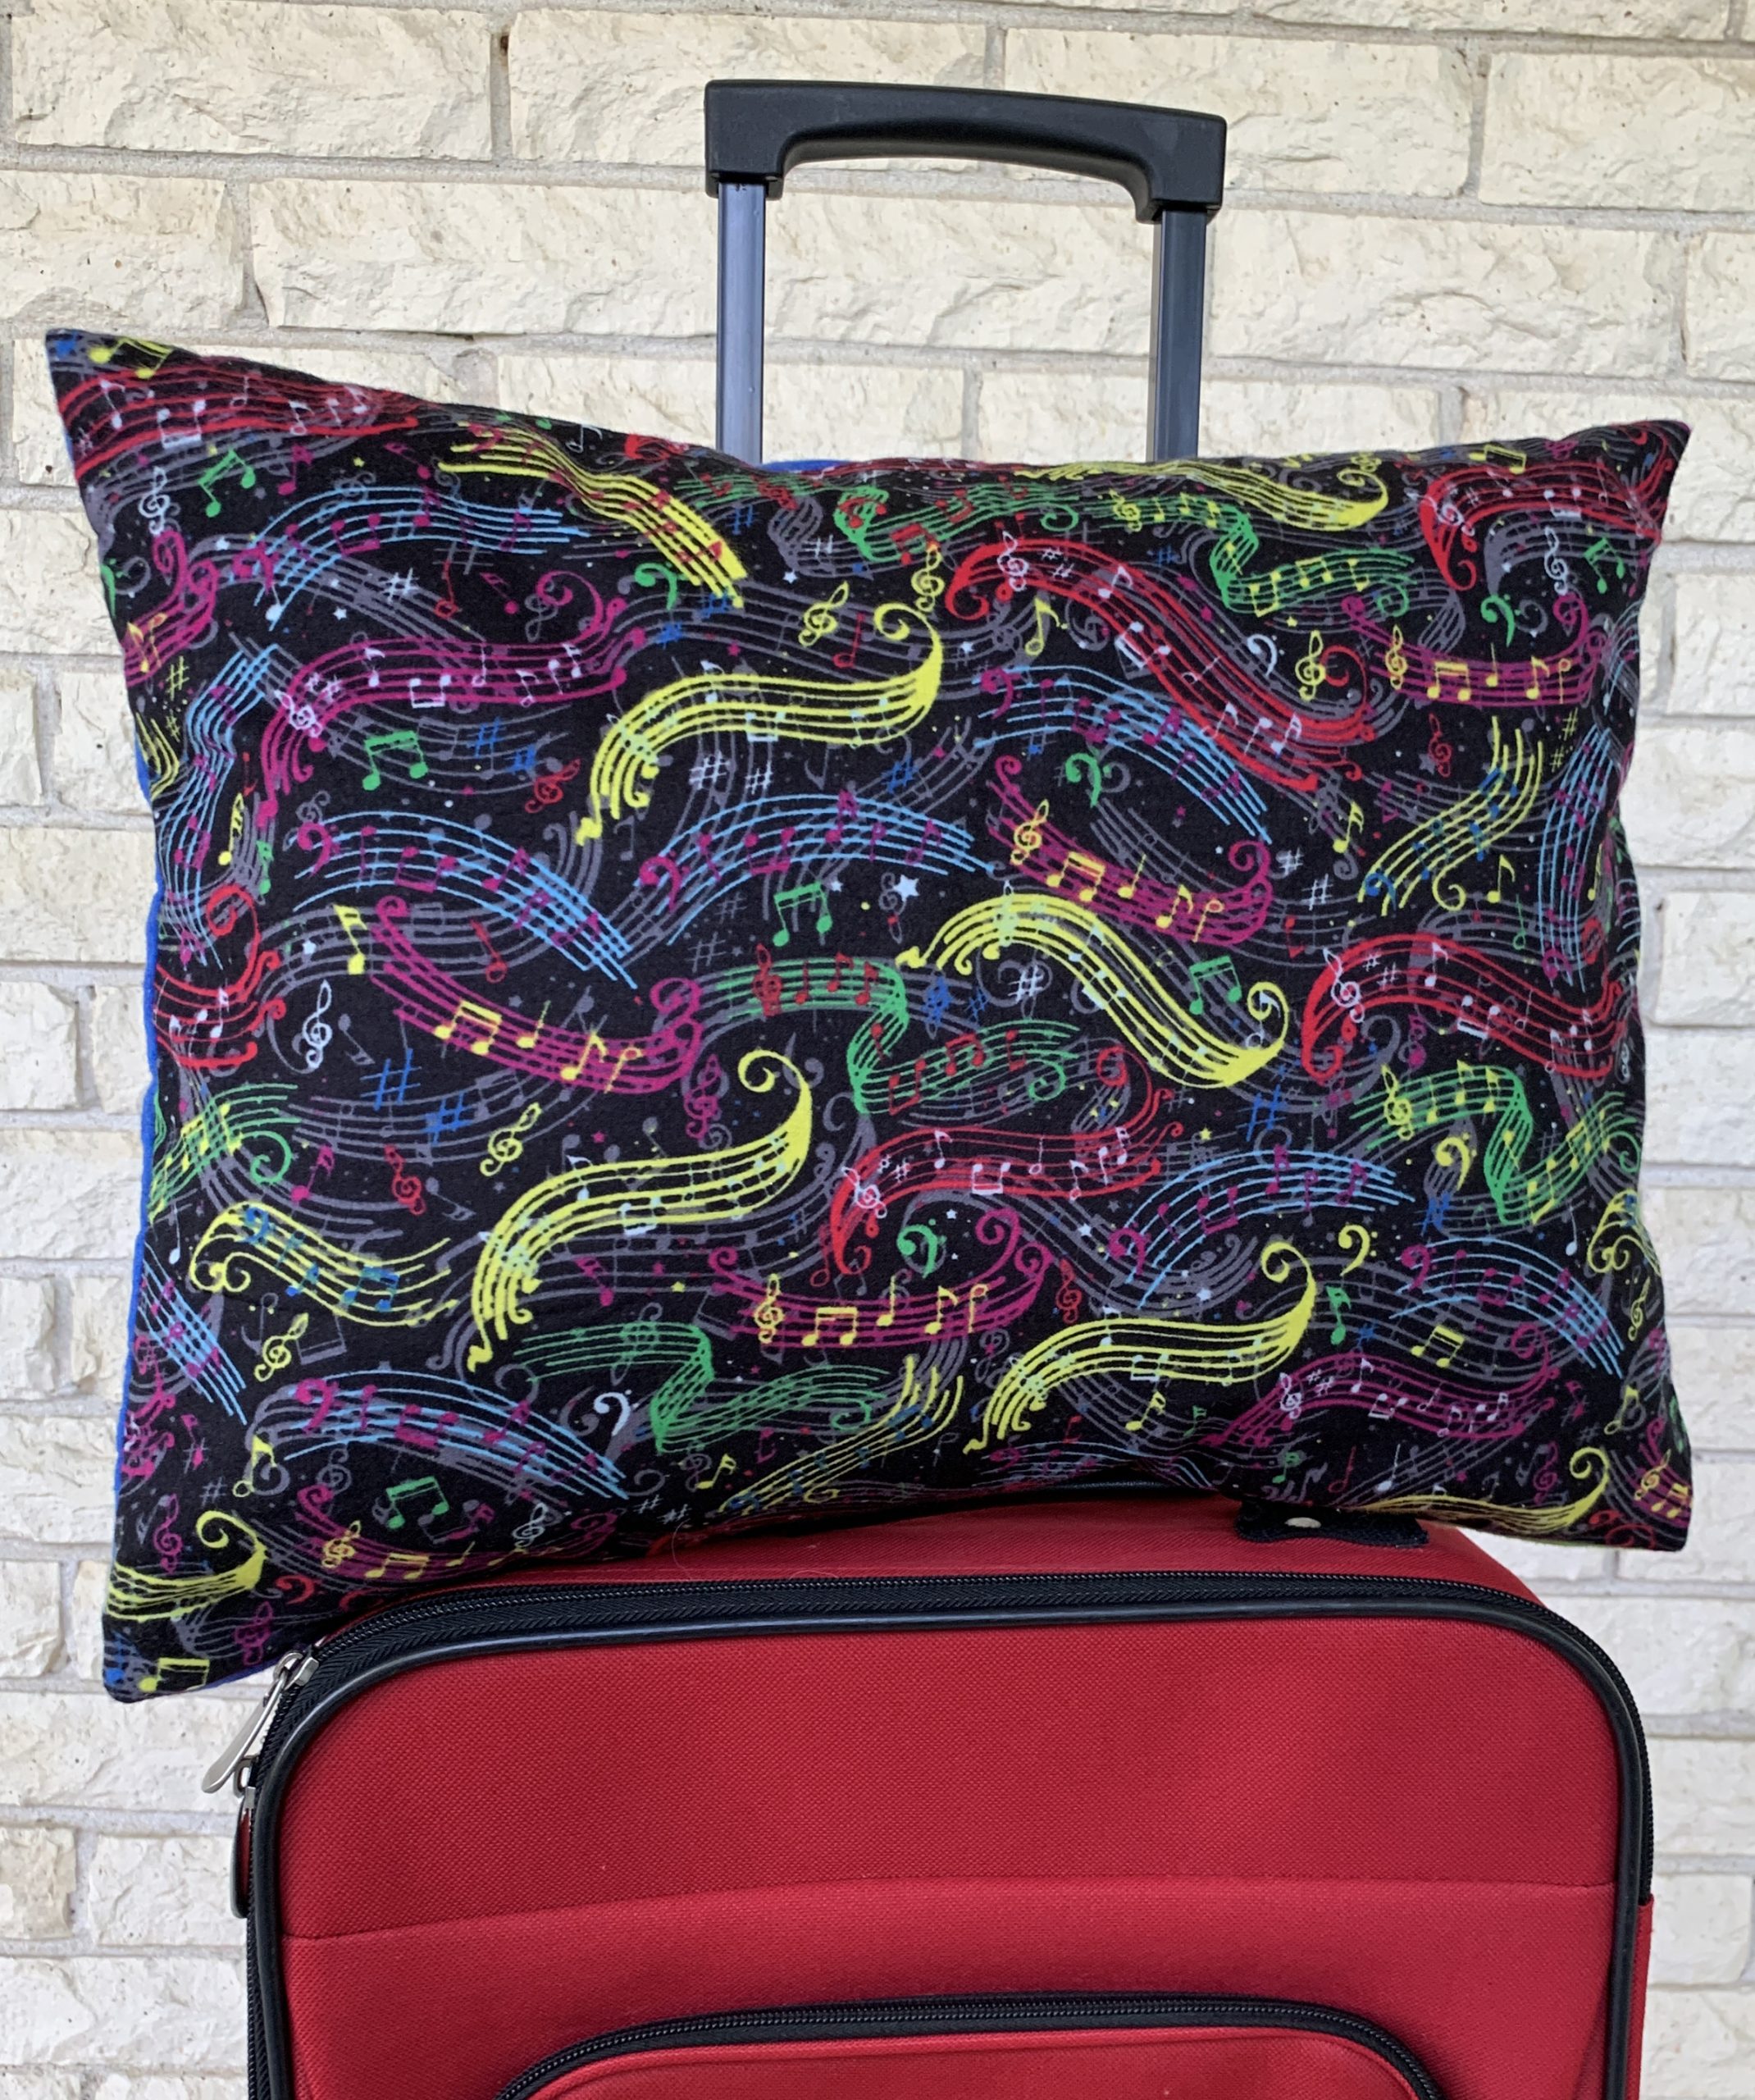
Sew a super simple travel pillow – for as little as $5! – with this tutorial. These pillows can be made as multiples for a travel group as a gift. Or sew them together with your scout troop for a fun sewing badge project. The cover can be personalized, and is removable and washable.
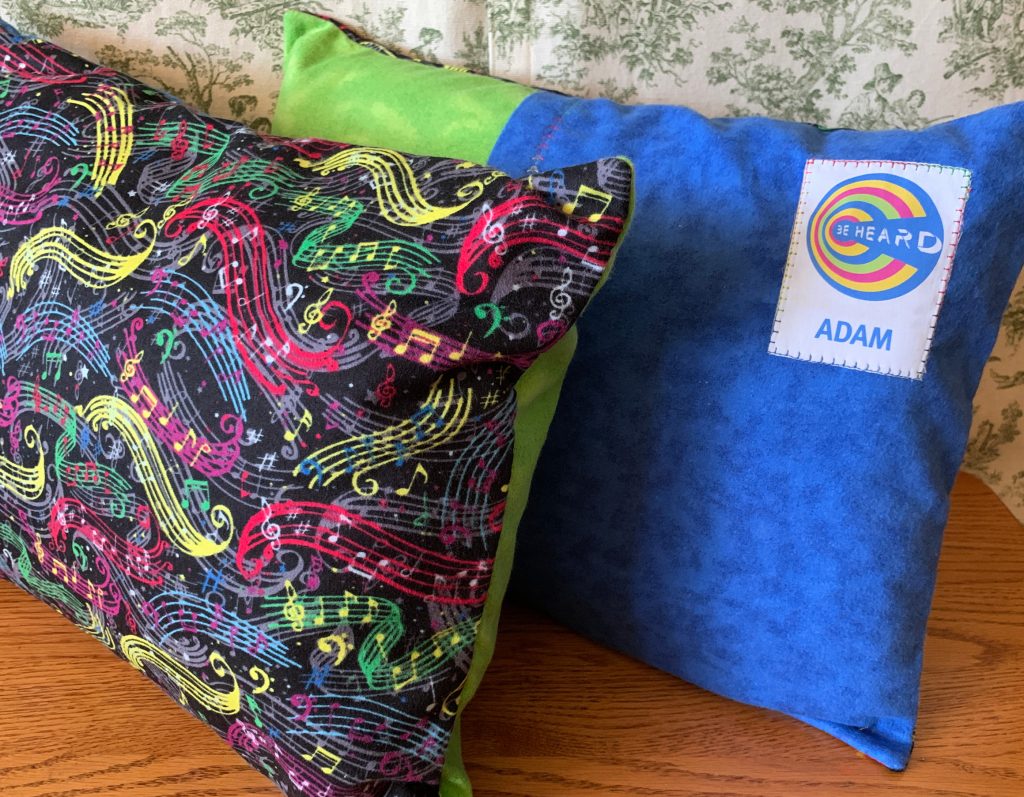
I volunteered to sew 20 pillows for my son’s marching band trombone section for their bus trip to competition out of state. It’s a fun send-off gift that is practical, has a special personal touch, and something even teenagers will appreciate.
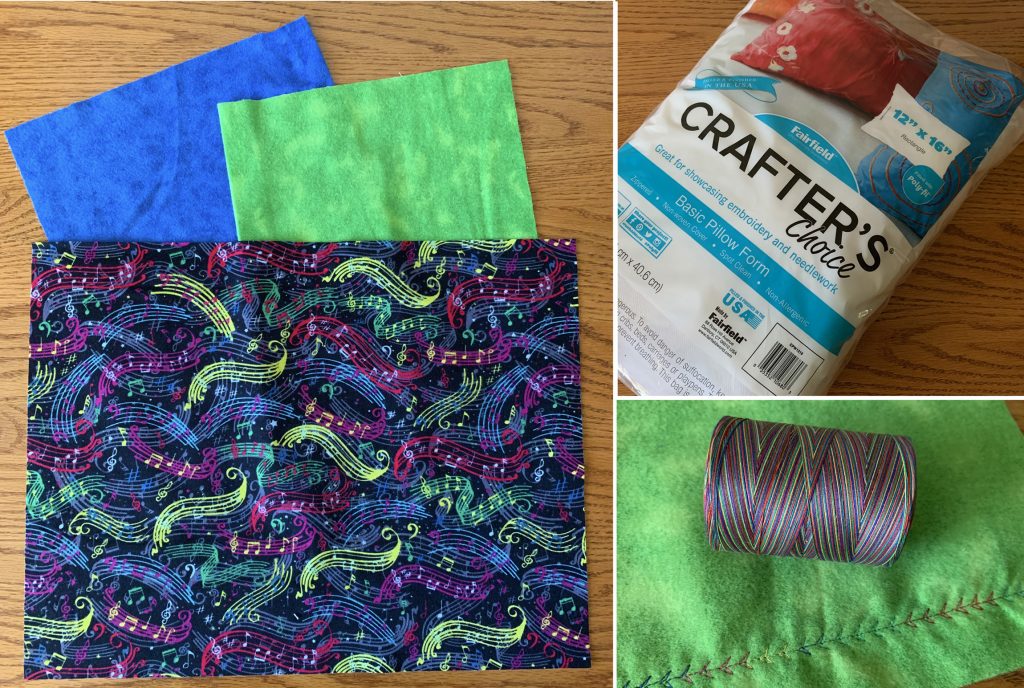
For the sample, I used Super Snuggle Flannel fabrics from Joann Fabrics. When on sale, it’s inexpensive at $2.99 per yard; and of course has a soft snuggly feel. The Crafter’s Choice pillow insert is from Walmart and costs $3.94 each, but amazingly you can also order a case of 24 for $53.30!
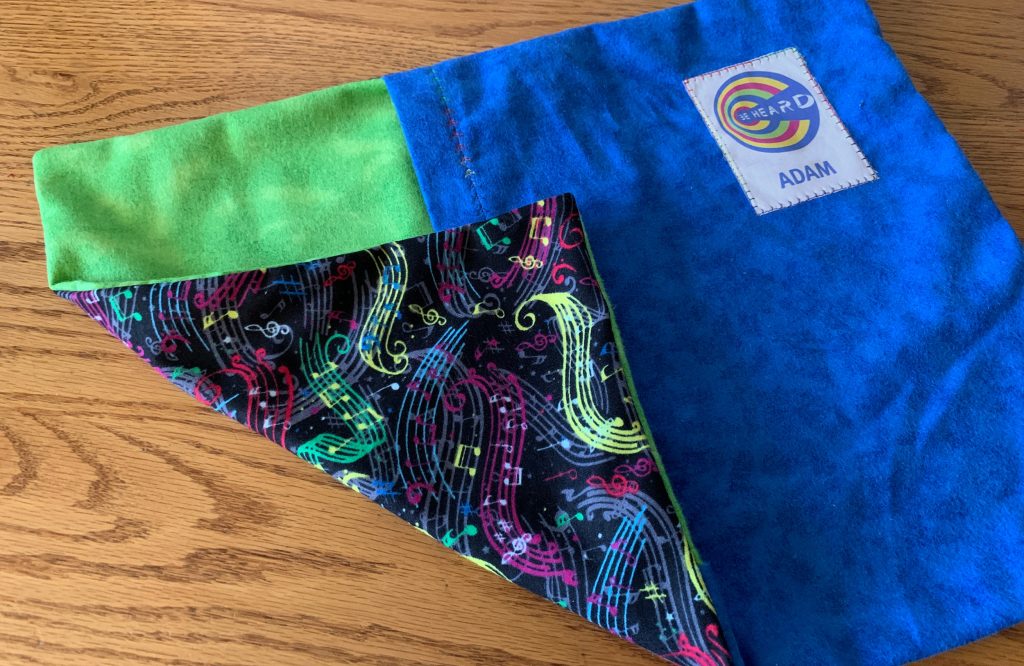
To step up the creativity, I added names and the marching show theme with iron-on printable fabric, and I played with some of the decorative stitches on my machine with fun variegated thread.
Supplies:
Front Fabric:
1 13.5 x 17.5 inch piece (if the pattern has a direction, make sure to cut so the pattern is upright horizontally)
Back Fabric:
2 13.5 x 12 inch pieces (my sample uses two different fabrics, but it can be made with just one)
12 x 16 inch pillow Insert
Thread (this is a great opportunity to use a fun variegated thread to add pizzazz to your decorative stitches)
Optional Supplies:
Printable Fabric, such as Blumenthal Craft Photofabric Cotton from Joann Fabrics
Paper backed fusible web (such as Wonder Under)
Note: To calculate fabric for multiples, you can fit 2 front pieces per fabric width on 5/8 yard, and 3 back pieces per fabric width on 5/8 yard.
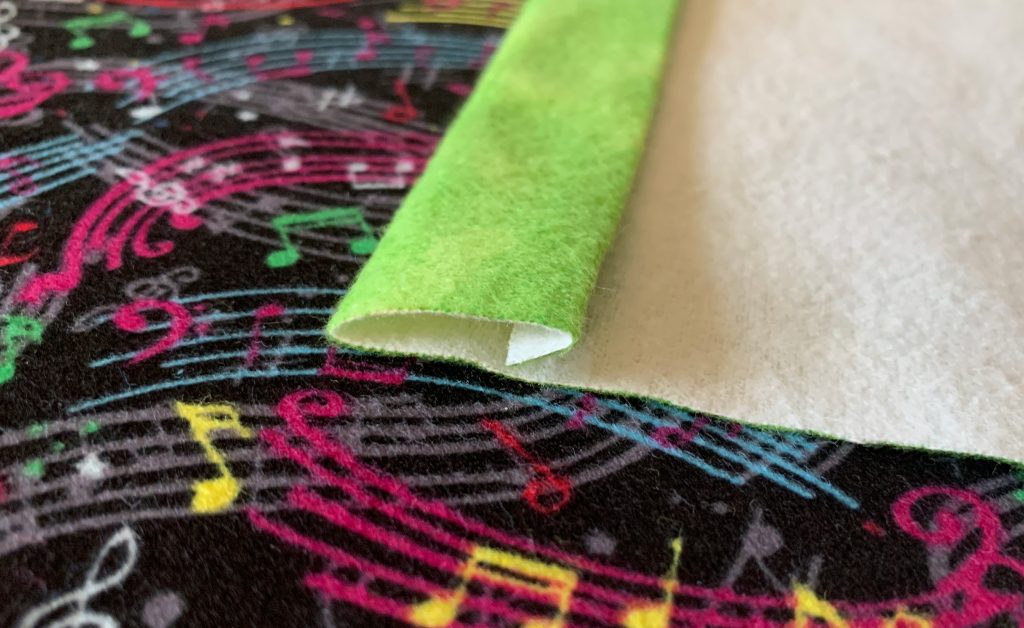
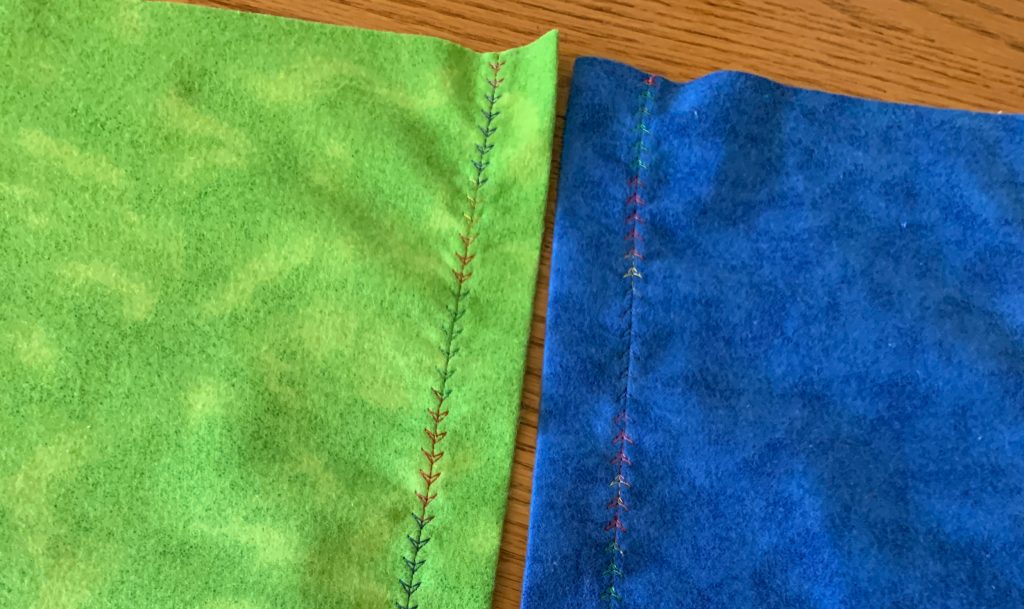
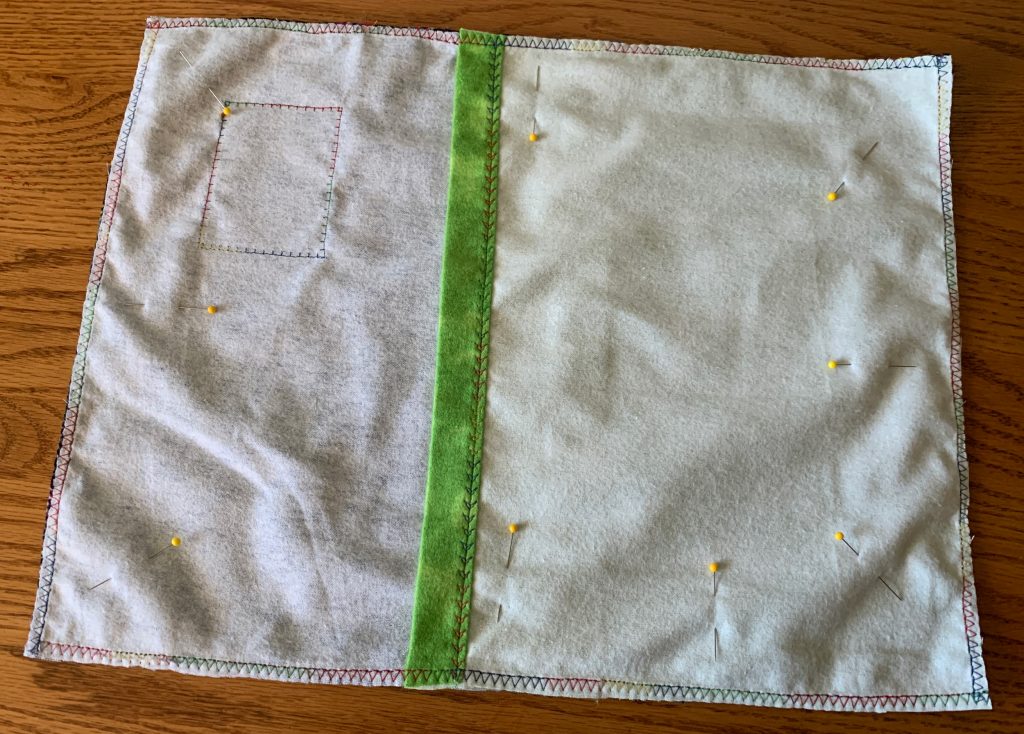
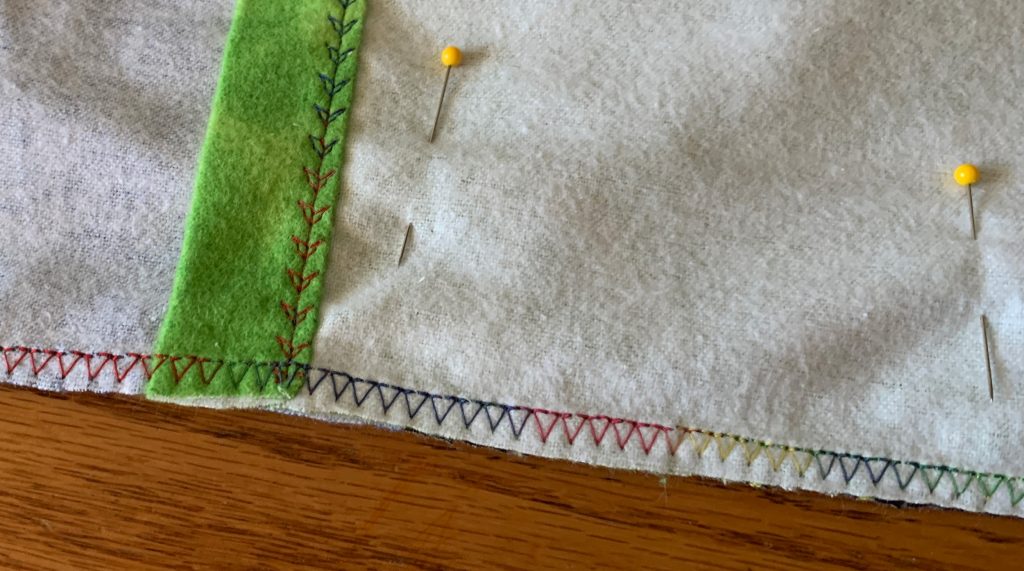
Sew the hems on the two back pieces. Fold and iron 1/4 inch then one inch along the 13 1/2 inch side of each back piece.
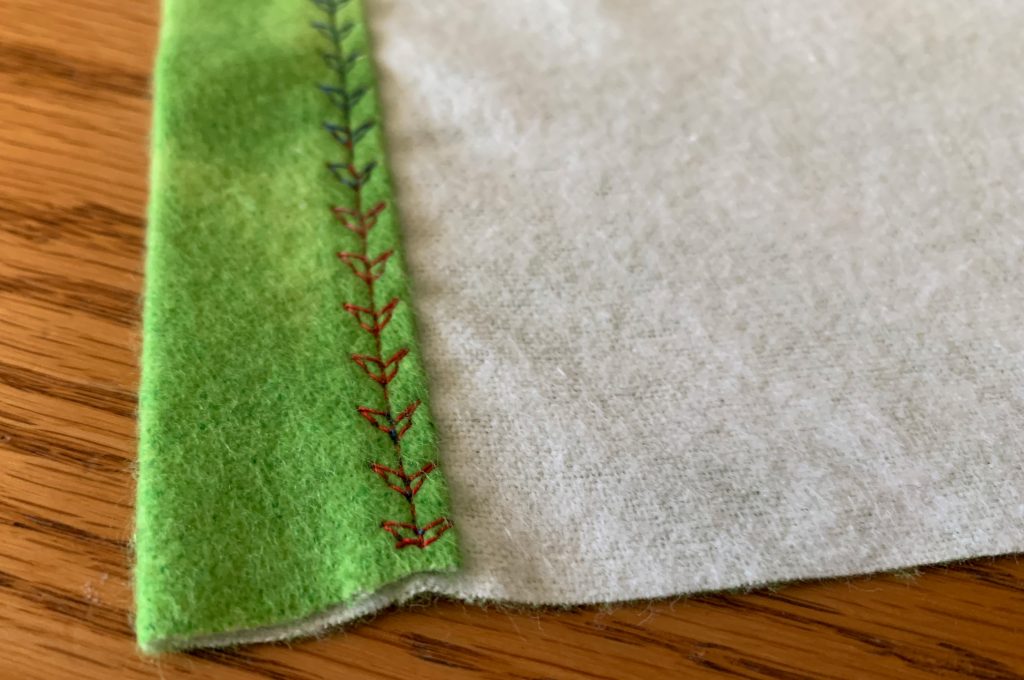
Sew along edge of each hem with a decorative stitch.
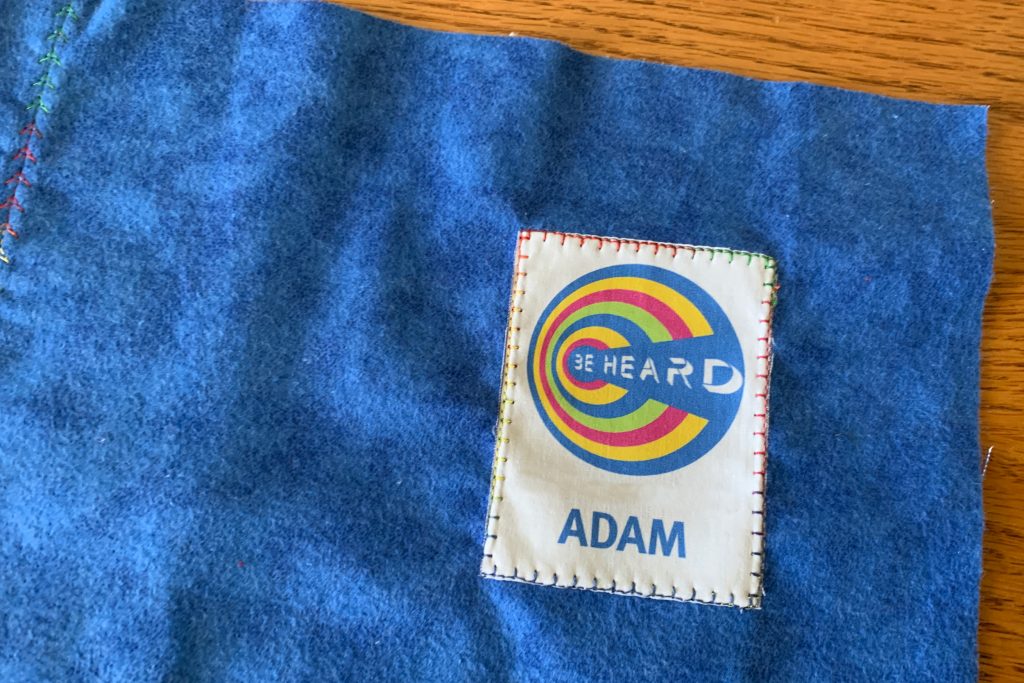
Optional: Add a printable fabric label, following the directions on the package, and using the fusible web to adhere to the fabric in any position you choose. Sew around the outside edge with a decorative stitch – this will help secure the label for washing.
Find another example of sewing with printable fabric in my post, Fringed Butterfly Pillow Pattern.
Place front and back pieces right sides together, lining up all the outer edges and overlapping the hemmed edges. Be sure to check that your fabric prints and the label are not upside down.
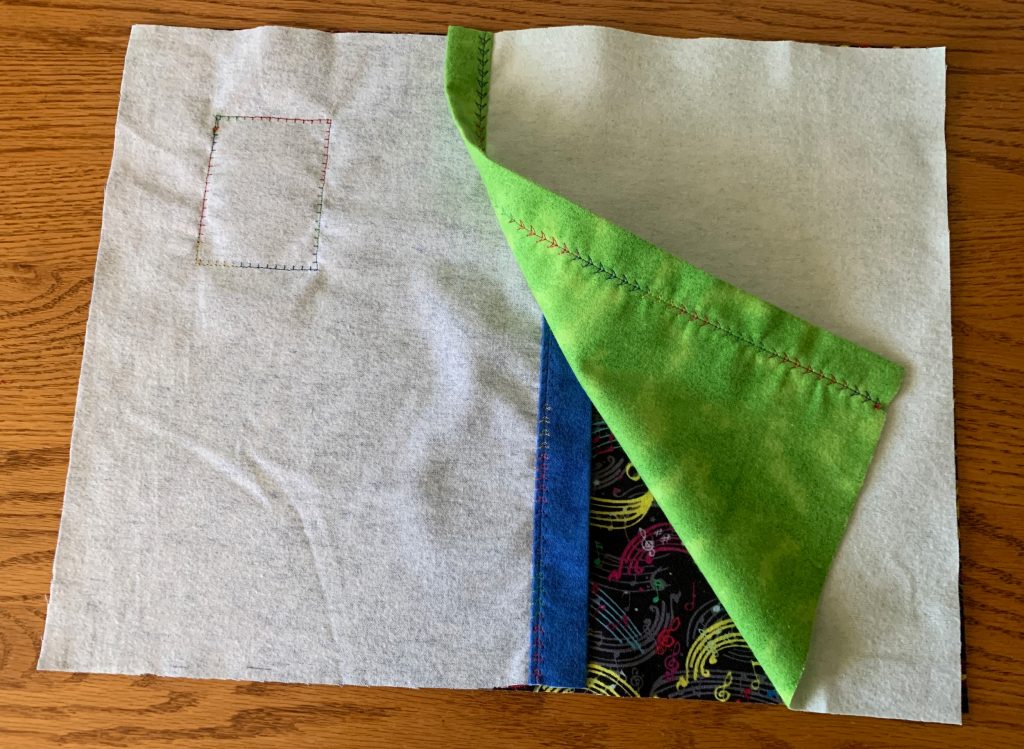
Pin around the outer edges, paying extra attention to the overlapping hems. Be sure the layer under the top hem is lined up to the edge, and everything is smooth, so your sewing will catch all the layers completely.
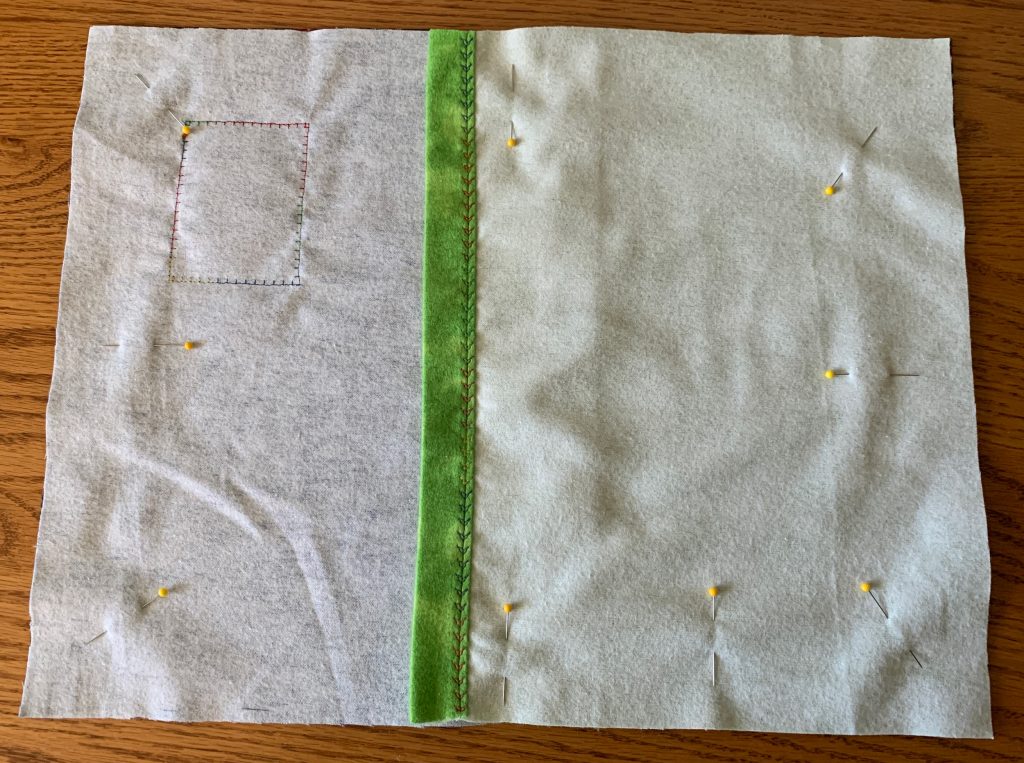
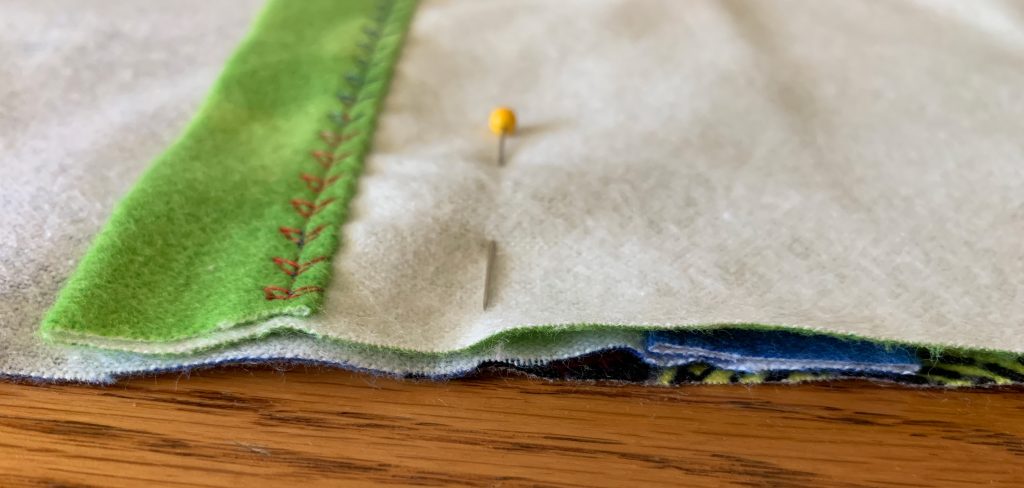
Sew around entire outer edge. I don’t have a serger machine, but I chose an over-edge stitch on my regular machine because flannel can fray easily. It’s a good substitute and keeps the edges neat and more sturdy than just a straight stitch. This stitch gives me about a 1/4 inch seam. This will leave a little extra room for the pillow insert and allow for shrinking when washed.
This is the best part – turn the right sides out to see your finished pillow! I use a dull skewer stick to gently poke out the corners.
Keep comfy with one of these travel pillows on your next trip!
Leave A Comment