
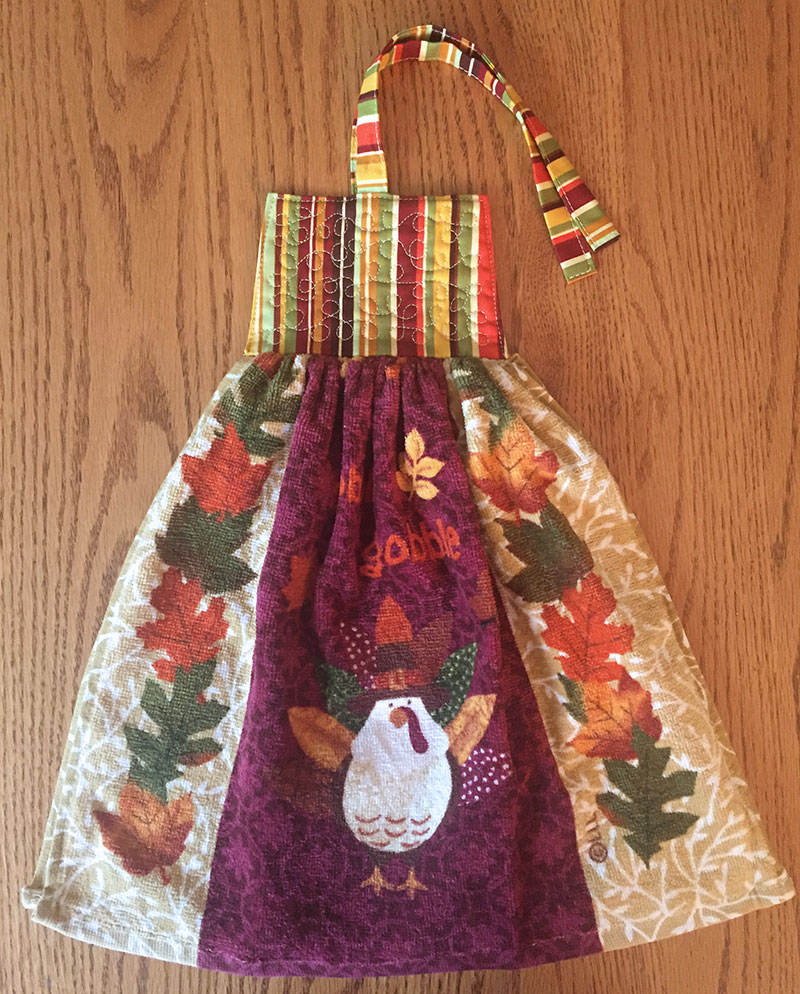
Fall Gathered Towel Topper Tutorial
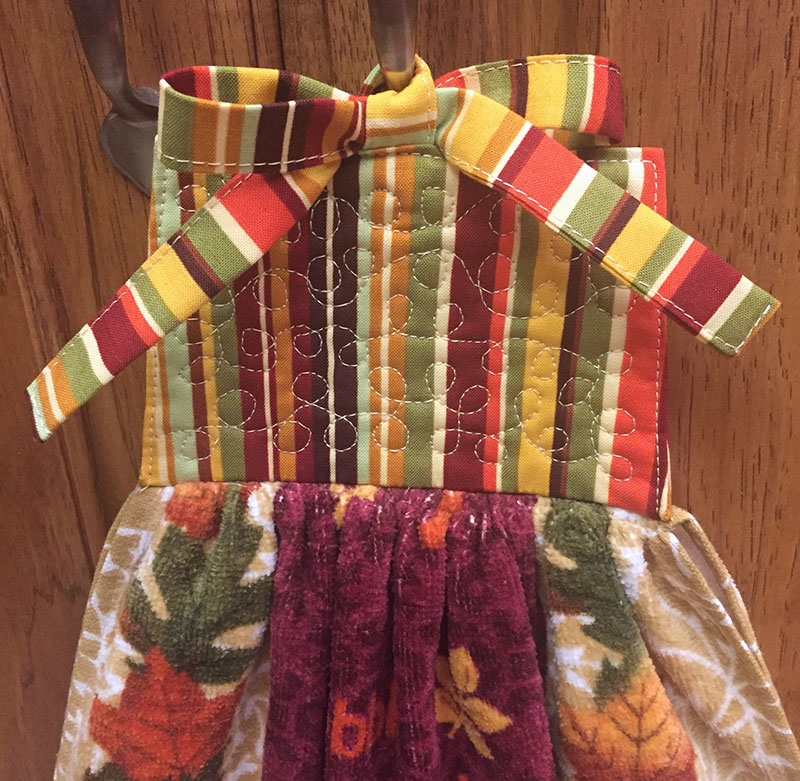
Here’s another version of the Super Simple Towel Topper Tutorial – adding gathering to the towel and creating your own quilted fabric. I tried a gathering option for towels that have images and words that go across the entire towel. And making your own quilted fabric makes it possible to use any coordinating fabric you like!
To create this towel, use the same supply list from my Super Simple Towel Topper Tutorial, replacing the pre-quilted fabric with regular fabric and batting pieces.
Supplies:
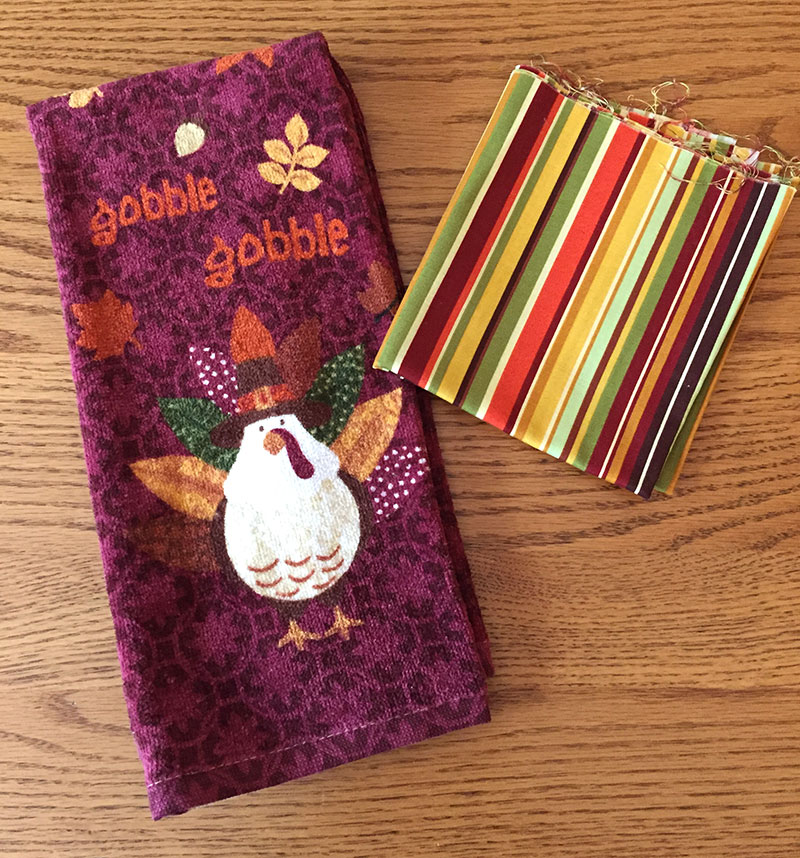
Kitchen towels (I’m using fall towels from the Christmas Tree Shops in this example.)
Fabric in coordinating colors and a piece of batting, both about 8 x 10 inches.
Two strips of the same fabric for ties (2 x 11 inches each)
Super Simple Instructions:
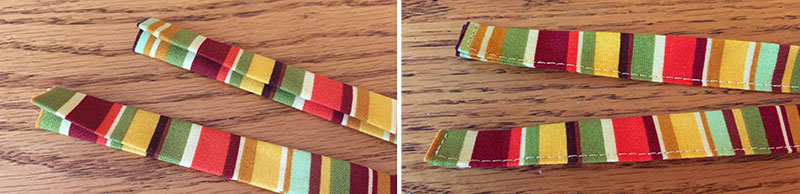
Create and sew the ties in the same way as my Super Simple Towel Topper Tutorial.
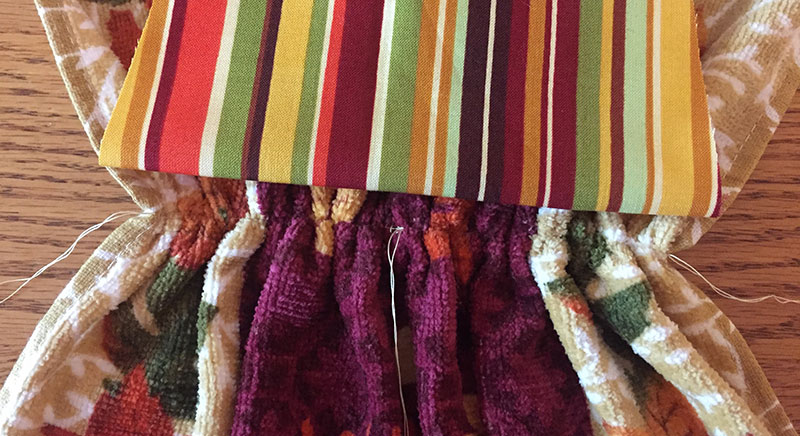
To gather the towel, sew along the center of the towel, using a basting stitch (the largest stitch on your sewing machine).
Tip for Success: Sew the basting stitch in two sections, from one edge to the center, then from the center to the other edge, leaving long threads on all the ends. Sewing shorter sections make it easier to pull the threads to gather.
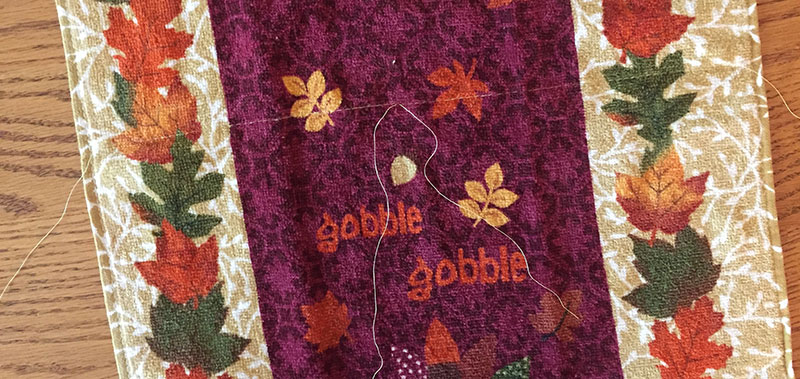
Pull the top threads to gather the towel. To keep the gather tight, tie the two top center threads together, then tie the top and bottom threads together at both edges.
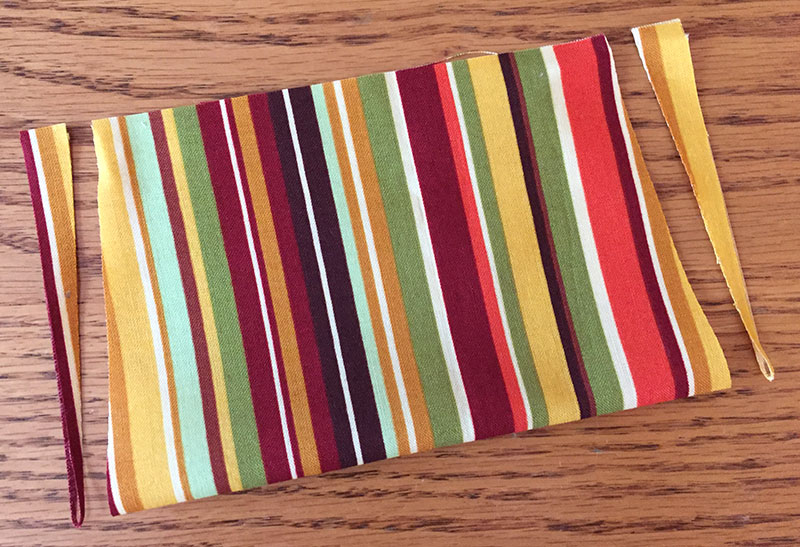
Measure the width of the gathered towel and cut the topper fabric 8 inches by 1 inch wider than the width. For example, my gathered towel is 5 ½ inches wide, so I cut my fabric 8 x 6 ½ inches.
Fold the fabric in half and cut an angle piece from each side, starting at the edge of the fold to ½ inch in at the cut edge.
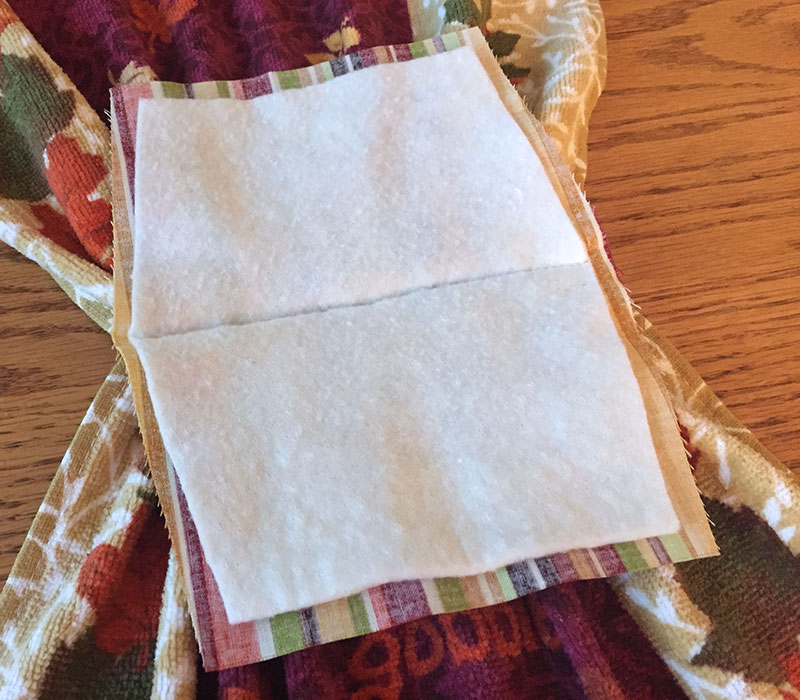
Unfold fabric and cut a piece of batting the same size as the topper fabric, minus the seam allowance on the sides and top.
Fold the fabric and batting in half and iron to create a crease for a stitching guide.
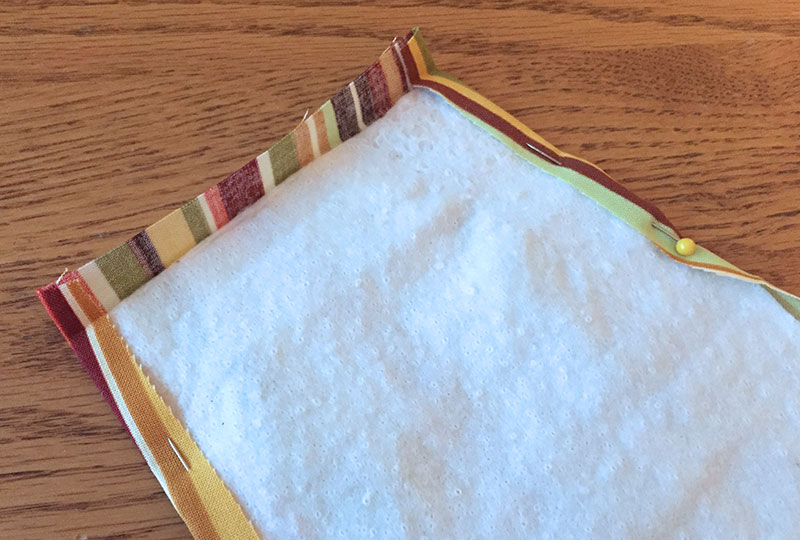
Pin the towel and the fabric/batting, right sides together, lining up the gathering stitch and the guide line, leaving the ½ inch topper fabric seam allowance overhanging on each side of the towel. Stitch along the guide line, starting and ending at the edge of the towel.

Fold in and iron the seam allowance on the sides of the topper ½ inch, then fold in the tops ½ inch and iron.
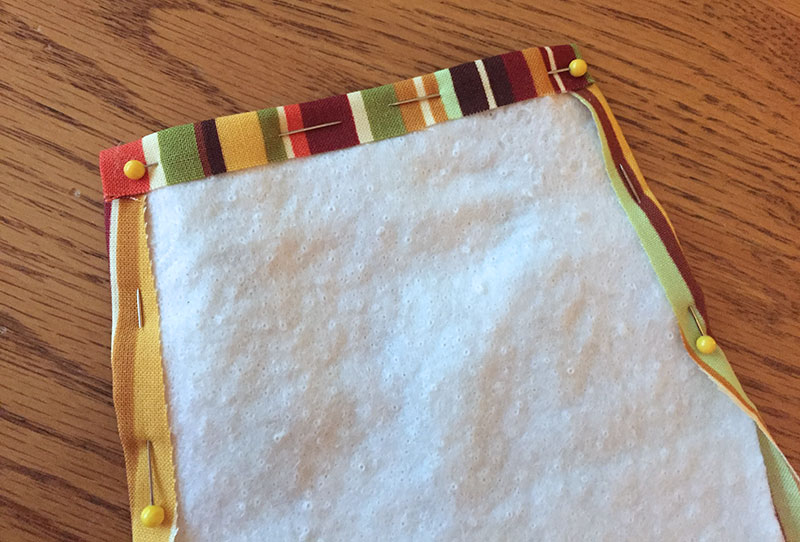
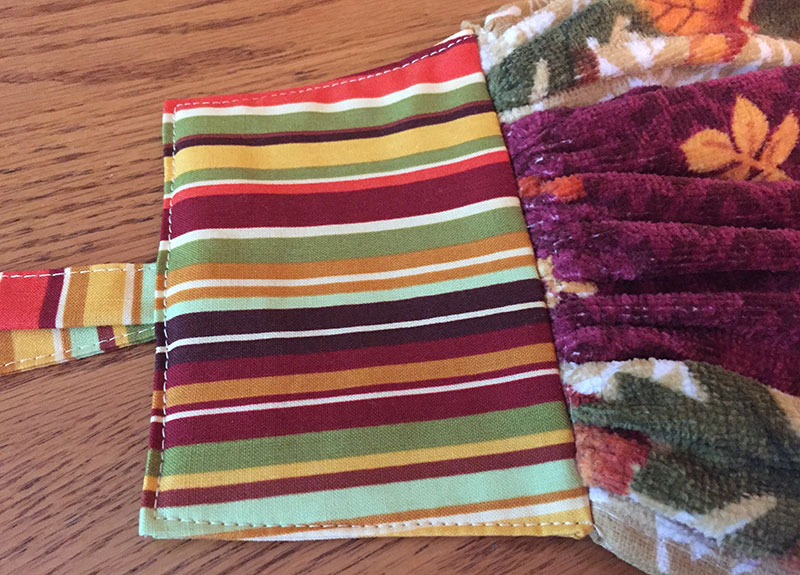
Fold the topper wrong sides together, add the ties inside at the top and pin. Carefully sew close to the edge around the topper.
Tips for Success: Use a micro stitch at the beginning and end of this stitching, to keep the stitches neat and clean. (A micro stitch is a super short length stitch that locks the ends without back stitching. On my Singer, I use a stitch length 3 for the main stitches, and start & stop with 3-4 micro stitches at .8 length.)
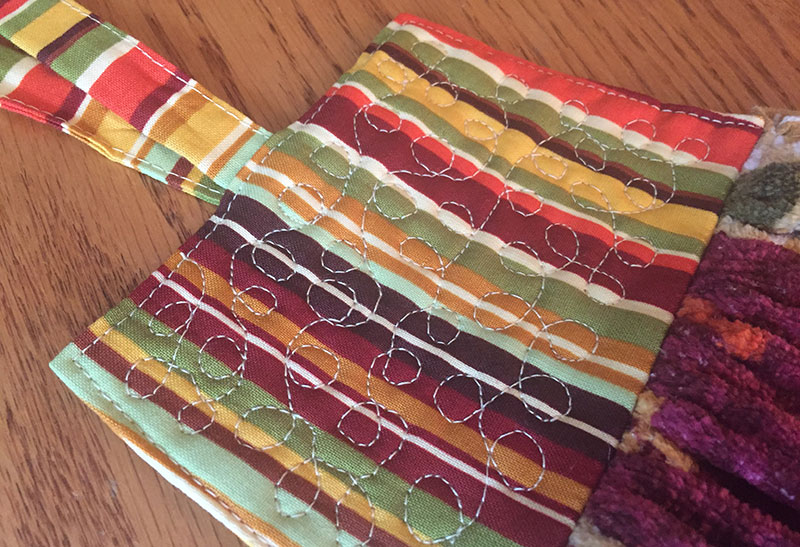
Now for some quilting fun. You can sew simple lines, wavy lines, or try some free motion quilting. (The little topper is a perfect size to try a little free motion. For inspiration, see my post about free motion quilting.)
Another cute and crafty towel project done. Enjoy!
Leave A Comment